
WordPress migration plugins don’t always work. There’s no explanation. It’s not predictable. The good news? It’s EASY to migrate WordPress sites without using plugins.
I’ve used WordPress plugins for my share of site migrations. Anything from All in One WordPress Migration to iThemes BackupBuddy.
The problem?
Sometimes the migrations will simply fail. And after you bang your head repeatedly on the desk, you hope for a better way. The good news?
There is a much more reliable method for migrating your WordPress sites!
In fact, after you move your first WordPress site using the command line and sFTP, you’ll never go back to using a WordPress migration plugin again. Ever. If people knew how easy this was, the site migration plugin business would be dead overnight.
You’ll need command line access to your server. You’ll also need to update your DNS records to point to the new server IP. And you’ll need an sFTP client.
Cool?
Here are the bullet proof steps to move sites:
Open up the wp-config.php file for your current site to get the db name, user and password.
Next use the command below to export your database. It’s going to ask you for the password, and then it will export the database as ‘sitedatabase.sql.’
mysqldump --no-tablespaces --opt -u USER_NAME -p DATABASE_NAME > sitedatabase.sql*Note: This command will not include table spaces. The PROCESS privilege is new as of MySQL 5.7.31 and MySQL 8.0.21 and is required to export table spaces. So to get around this, we tell the export process to skip them as they’re irrelevant for WordPress sites.
You will be prompted to enter the password, which is also contained in the wp-config.php file.
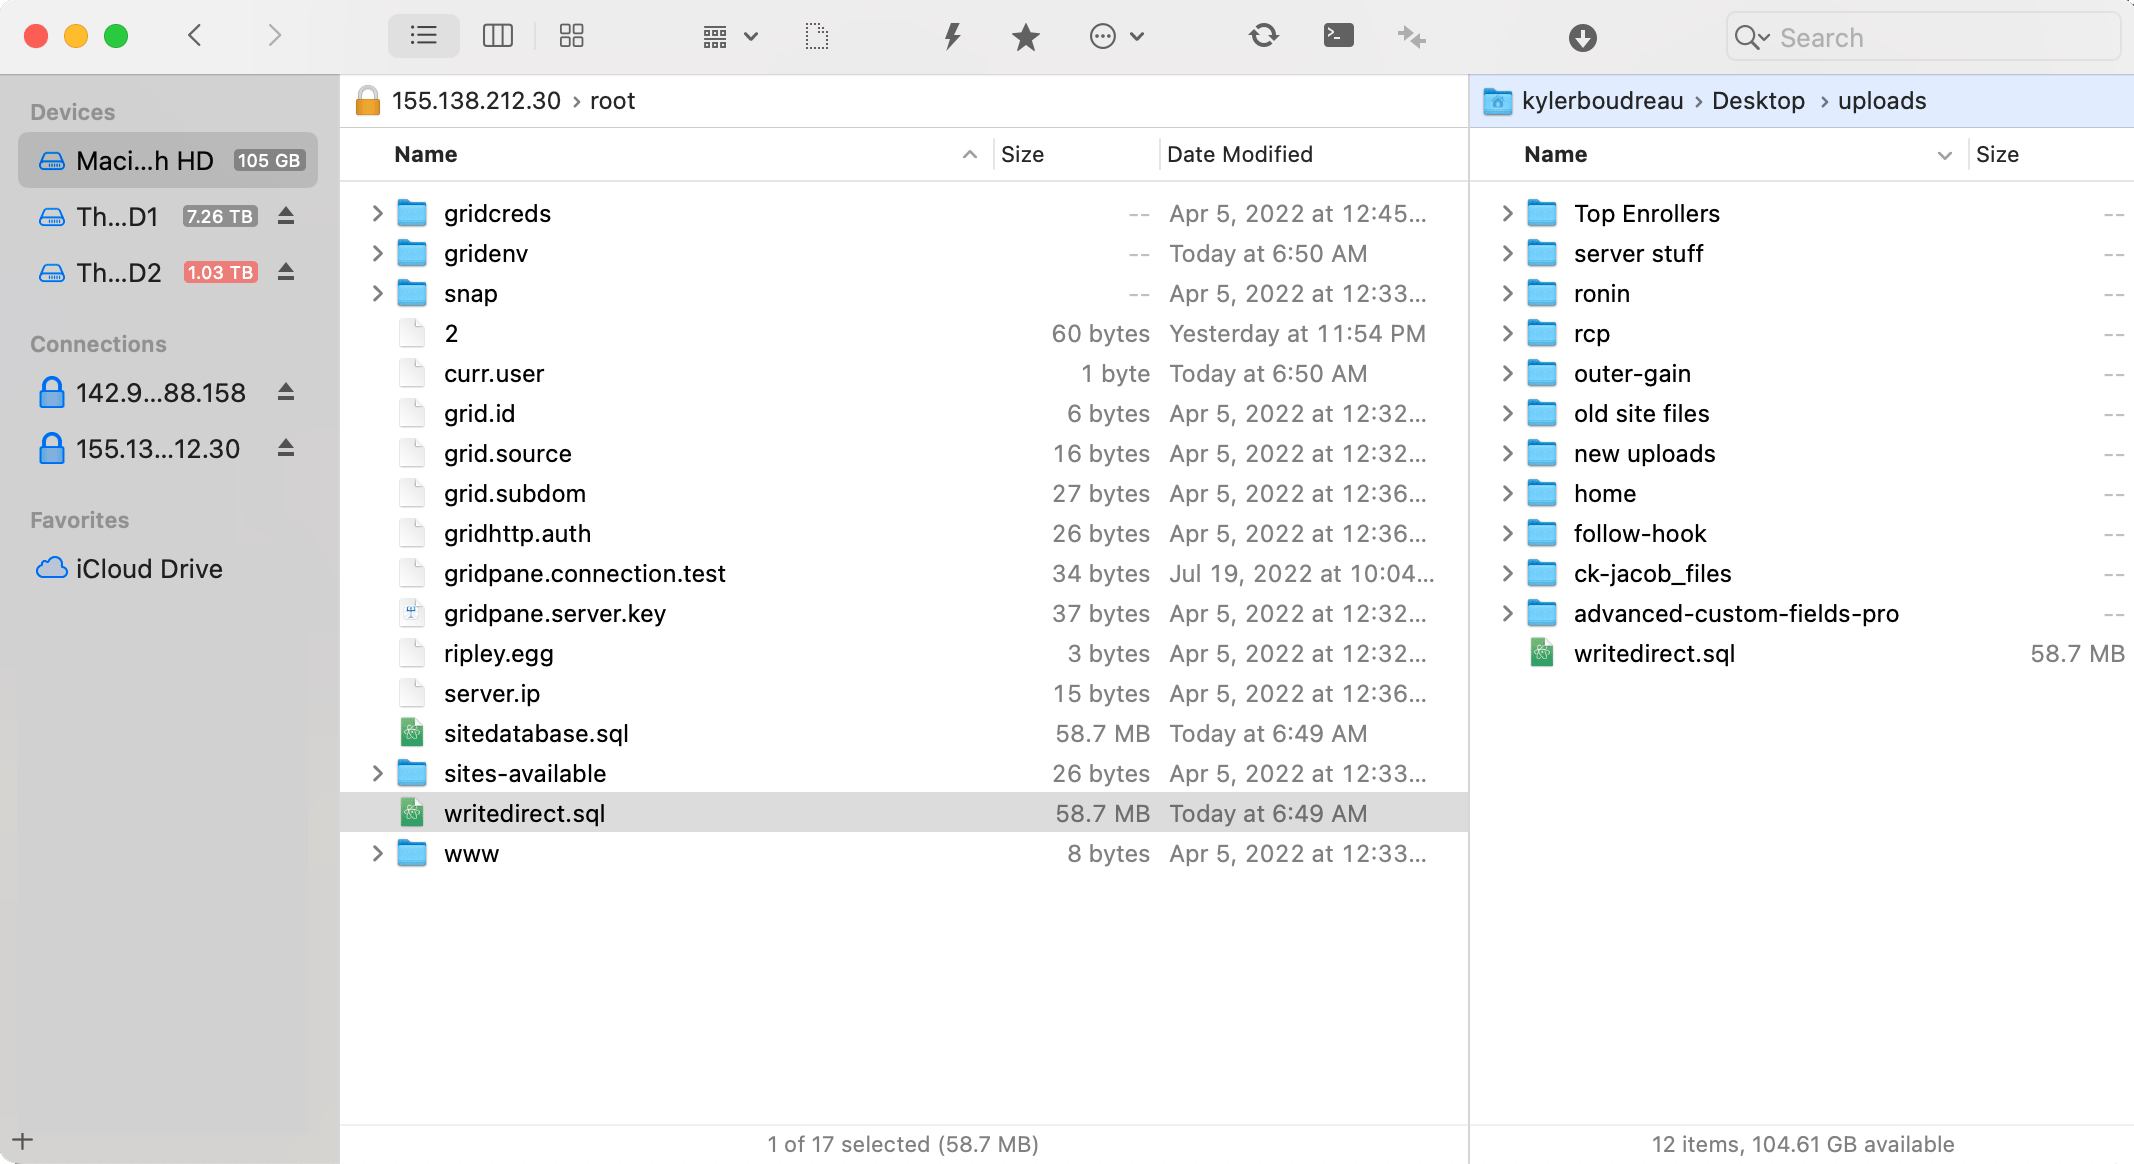
You can find the exported database file with an sFTP client like ForkLift from Binary Knights (for OSX users). Note: The sql file will be in the root folder on your server. Not the root of your server, the root folder.
Next on the command line you need to move to the parent folder that your website files and folders are located in. Basically, the folder that contains your WordPress folders like wp-content, etc.
Example: If your site files are in /var/www/kylerboudreau.com/public_html then enter the following command:
cd /var/www/kylerboudreau.comNow it’s time to zip up your site! Make sure you remove any archived backup files from those plugins that don’t work that well anyway — The backup files hog a lot of space. Once you’ve cleaned stuff up run:
zip -r choosefilename public_html*Note: If your site files were in another folder besides ‘public_html’ then name that folder in the command.
You’ll see the zip file in the ‘yoursite.com’ directory. Copy this to your local computer.
You need to get a clean install of WordPress up and running on the new server.
Once you have the new WordPress install live, we need to toast all the files.
On the destination server, sign in via command line and type the following command where yoursite.com is the name of your website, and public_html is the folder that contains the WordPress files and folders.
rm -r /var/www/yoursite.com/public_htmlNow use your sFTP client to copy the zip and sql files to the destination server. Place them in the parent folder for your site. Example: If your new site is located in /var/www/yoursite.com/public_html copy the files to /var/www/yoursite.com.
On the command line of the new server, move the folder you copied the files to above.
cd /var/www/yoursite.comNow unzip the zip file (use the name you selected in Step 3):
unzip choosefilename.zipOpen up the WP-Config.php file for your your new WordPress site on the destination server.
Once you have this open and see the database name, user name and password, type the following command on the command line (use the name of your sql file from Step 1):
mysql -u USER_NAME -p DATABASE_NAME < sitedatabase.sqlOnce you enter the command, it will prompt for the password.
*Note: If you receive an ‘Unknown Collation’ error, edit the sql file in a text editor like Sublime Text. Find and replace “utf8mb4_0900_ai_ci” with “utf8mb4_general_ci“. Then copy the updated SQL file back to your new site folder and run the import command again. See this Freaky Jolly article for more information.
If you’re using Gridpane and had Fail2Ban enabled on the original site, you’ll need to enable it on the new site or you’ll get errors in your browser (that say nothing about the Fail2Ban plugin).
That’s it! This may have seemed like a lot of steps, but once you see how easy it is to migrate your WordPress sites without using problematic and expensive migration plugins, you’ll never go back.
A special thanks to Gridpane for providing some of the steps here. If you aren’t using them, I highly recommend it!
As you may or may not know, I'm a filmmaker by trade. And something is in the works that might interest you or someone you know! It's called Write & Direct, and if you want to make movies, it's your inciting incident. It's your catalyst in the journey of becoming a filmmaker. There's nothing else quite like it.
Launch date: Summer of 2023. Enter your name and email to find out more!


Sometimes it's my latest film. Or a new review. Maybe a write-up on fly fishing? What I can promise is that it'll be good!