Decided it was time to engage a control panel, and went with Gridpane due to their excellent support and feature sets. In this article I take you from start to finish.
I’ve used Linode VPS servers for a long time. They have been fast and reliable. But there’s been a problem: I can spin up Debian/Ubuntu servers, set them up and get sites going with no issue. But when it comes to detailed database tuning, firewall configuration or tech issues, I’m lacking.
Decided it was time to engage a control panel, and went with Gridpane due to their support and feature sets. If you’re like me two months ago, you’re probably wondering what a control panel offers. Don’t worry, we’ll get to that.
This blog post will walk you through a start to finish task list of setting up Gridpane, provisioning a server and moving an existing WordPress site to the new install. Ready? Here are the topics I’m covering:
Gridpane provides an entire admin interface to your servers and websites. This alone makes life easier, but it doesn’t stop there. Gridpane is focused on WordPress, and they have a LEMP stack tuned for the best performance. Plus the stack adjusts config parameters whenever you resize your VPS! Some other important points:
There’s even more, but you can see by the above feature set that your VPS servers will benefit in massive ways.
Next I’m going to take you through setting up the defaults, creating and connecting to a server, and setting up a website. I had a few questions during this process, and documented my journey which is specific to Linode, OSX and WordPress websites.
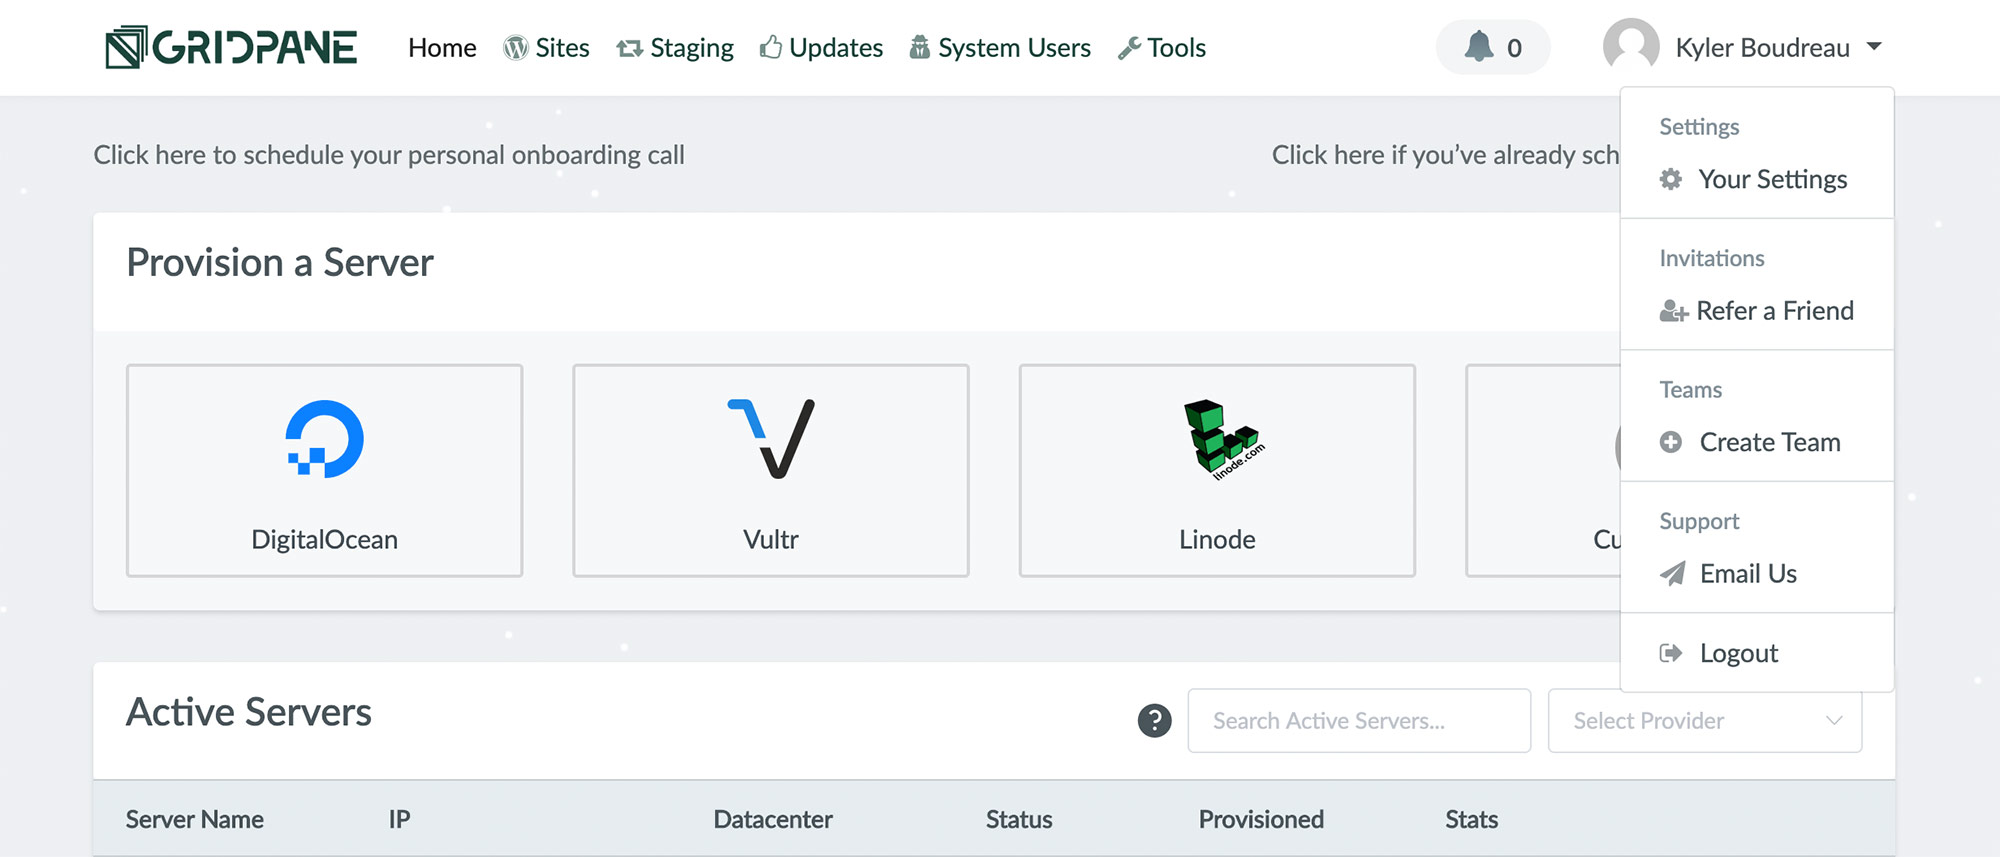
Click on your name at the top right of Gridpane and then go to Your Settings. Here we’ll set some basic options before setting up servers or websites.
First you’ll need to sign in at Linode and click your account name in the top right. Then My Profile. Go to the API Tokens tab. Click Add a Personal Access Token and grant it Read/Write. I’m sure you can narrow it down, but I just did everything. Copy the new API key and paste it in as a new token at Gridpane > Your Settings > Cloud Providers > LINODE API.
What’s this about? It’s recommended to not use the default gridpane user that’s setup upon server creation when you’re creating your nginx sites. Go to System Users and add a user for each of your servers.
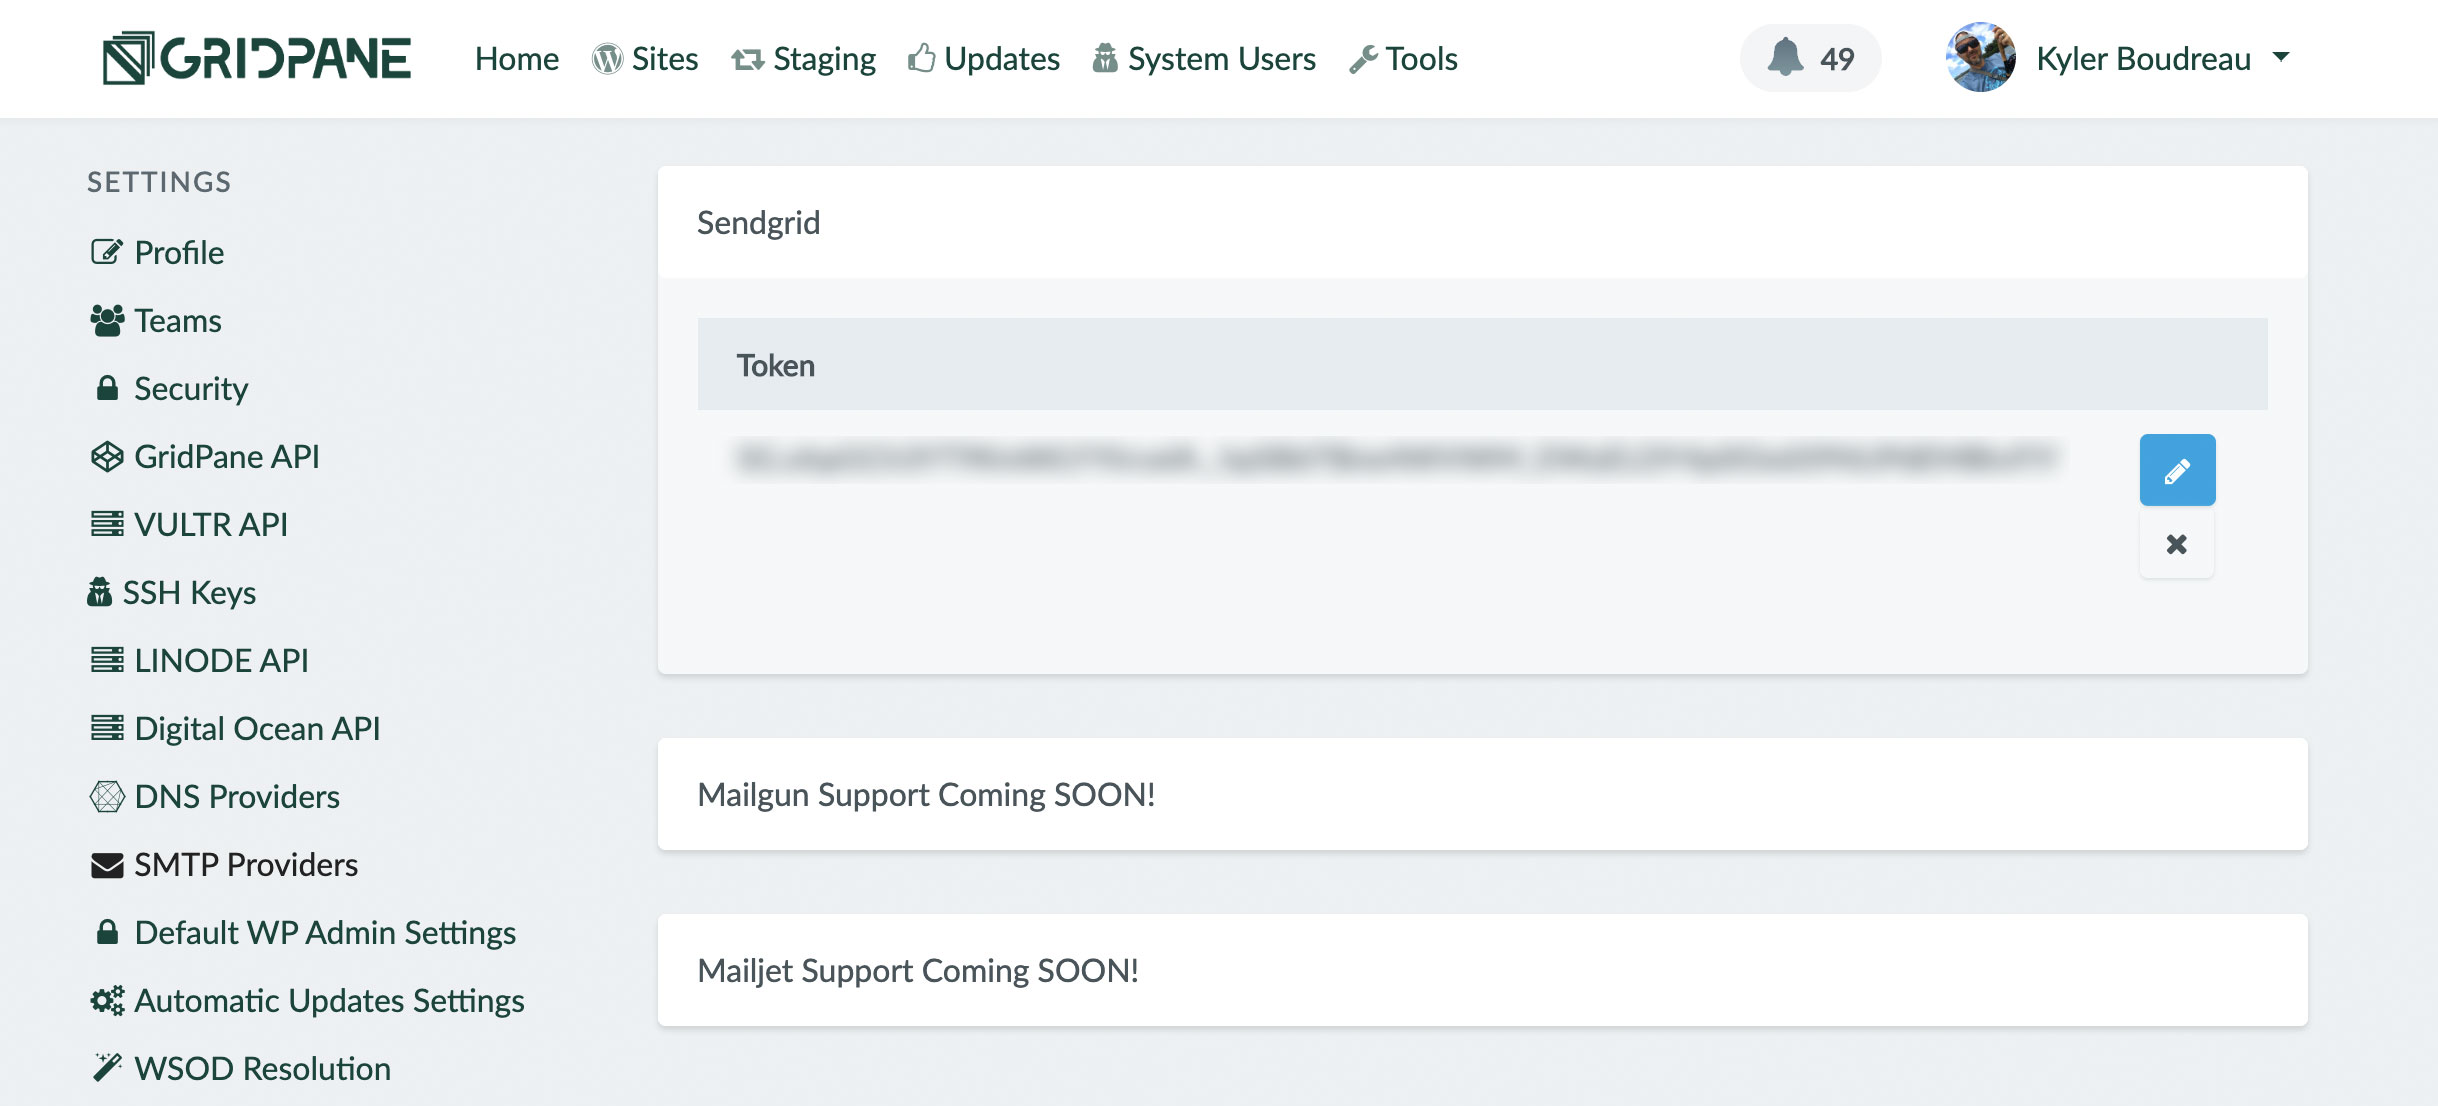
Under SMTP Providers I added my Sendgrid API key as a global site token. You can then enable this on a per site basis, which we’ll cover in a minute.
Here can enter the default admin account you want to create on all of your WordPress sites. NICE! You can also set some defaults like PHP version, etc.
Okay, so this a pretty sweet time-saver. You can name and create a new bundle. Then within that you can add default theme and plugins to use on any new website using this bundle.
Here’s what you need to know:
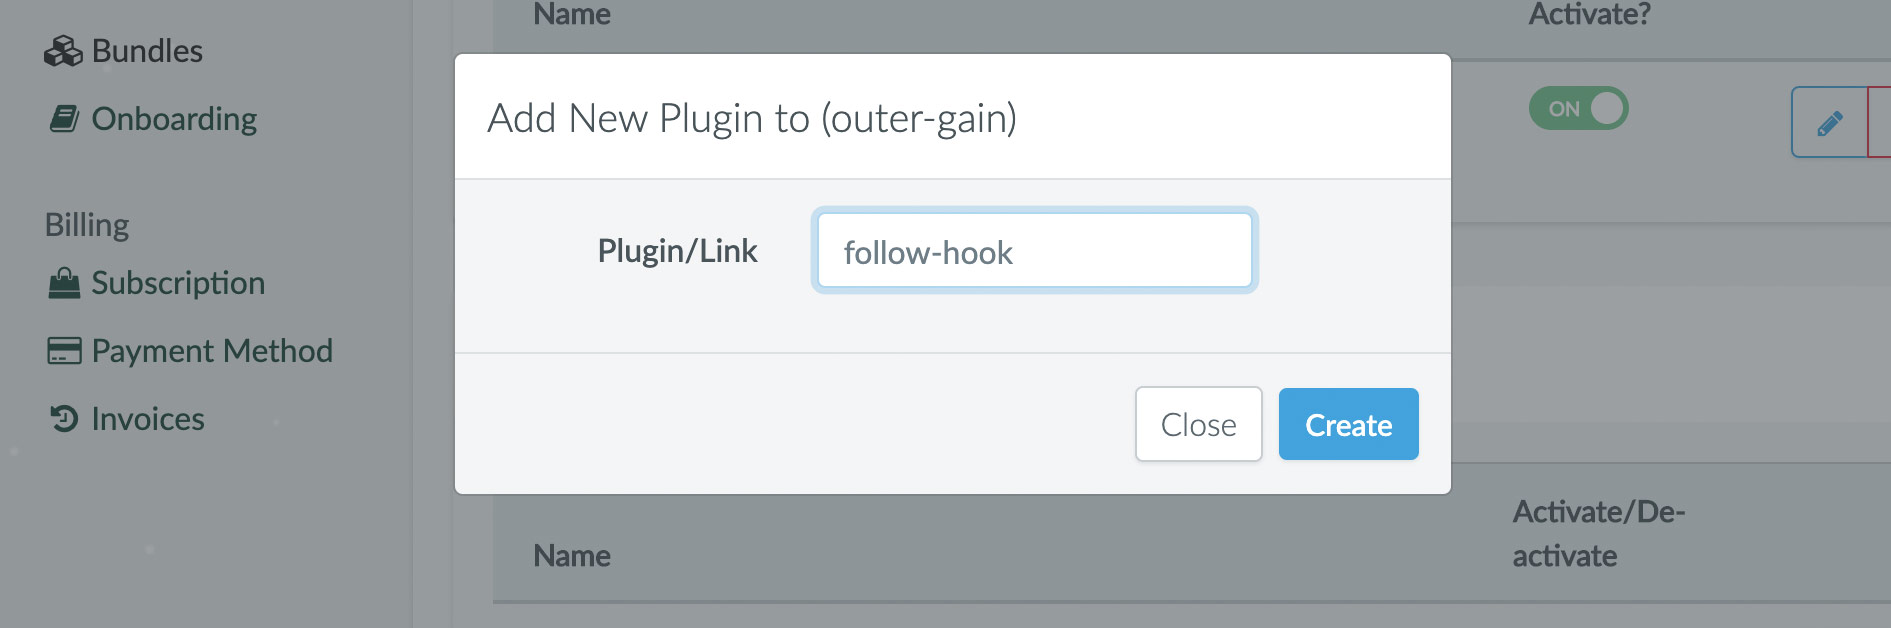
1) Only include the end of the plugin or theme URL at WordPress.org. Not the full address. The Follow Hook CRM full URL is https://wordpress.org/plugins/follow-hook/. To add this plugin to a bundle, simply enter follow-hook as show below.
2. If you want to add licensed plugins that aren’t hosted at WordPress.org, use a full URL to a path they can be downloaded from. Example:
https://yousite.com/the-folder/your-plugin-file.zip.
With these basic defaults complete, it’s time to provision a server! As you can see below, the current choices are Digital Ocean, Vultr and Linode. I’m all about Linode, so that’s who we’re using. And not to state the obvious, but point one above is required for this to work.
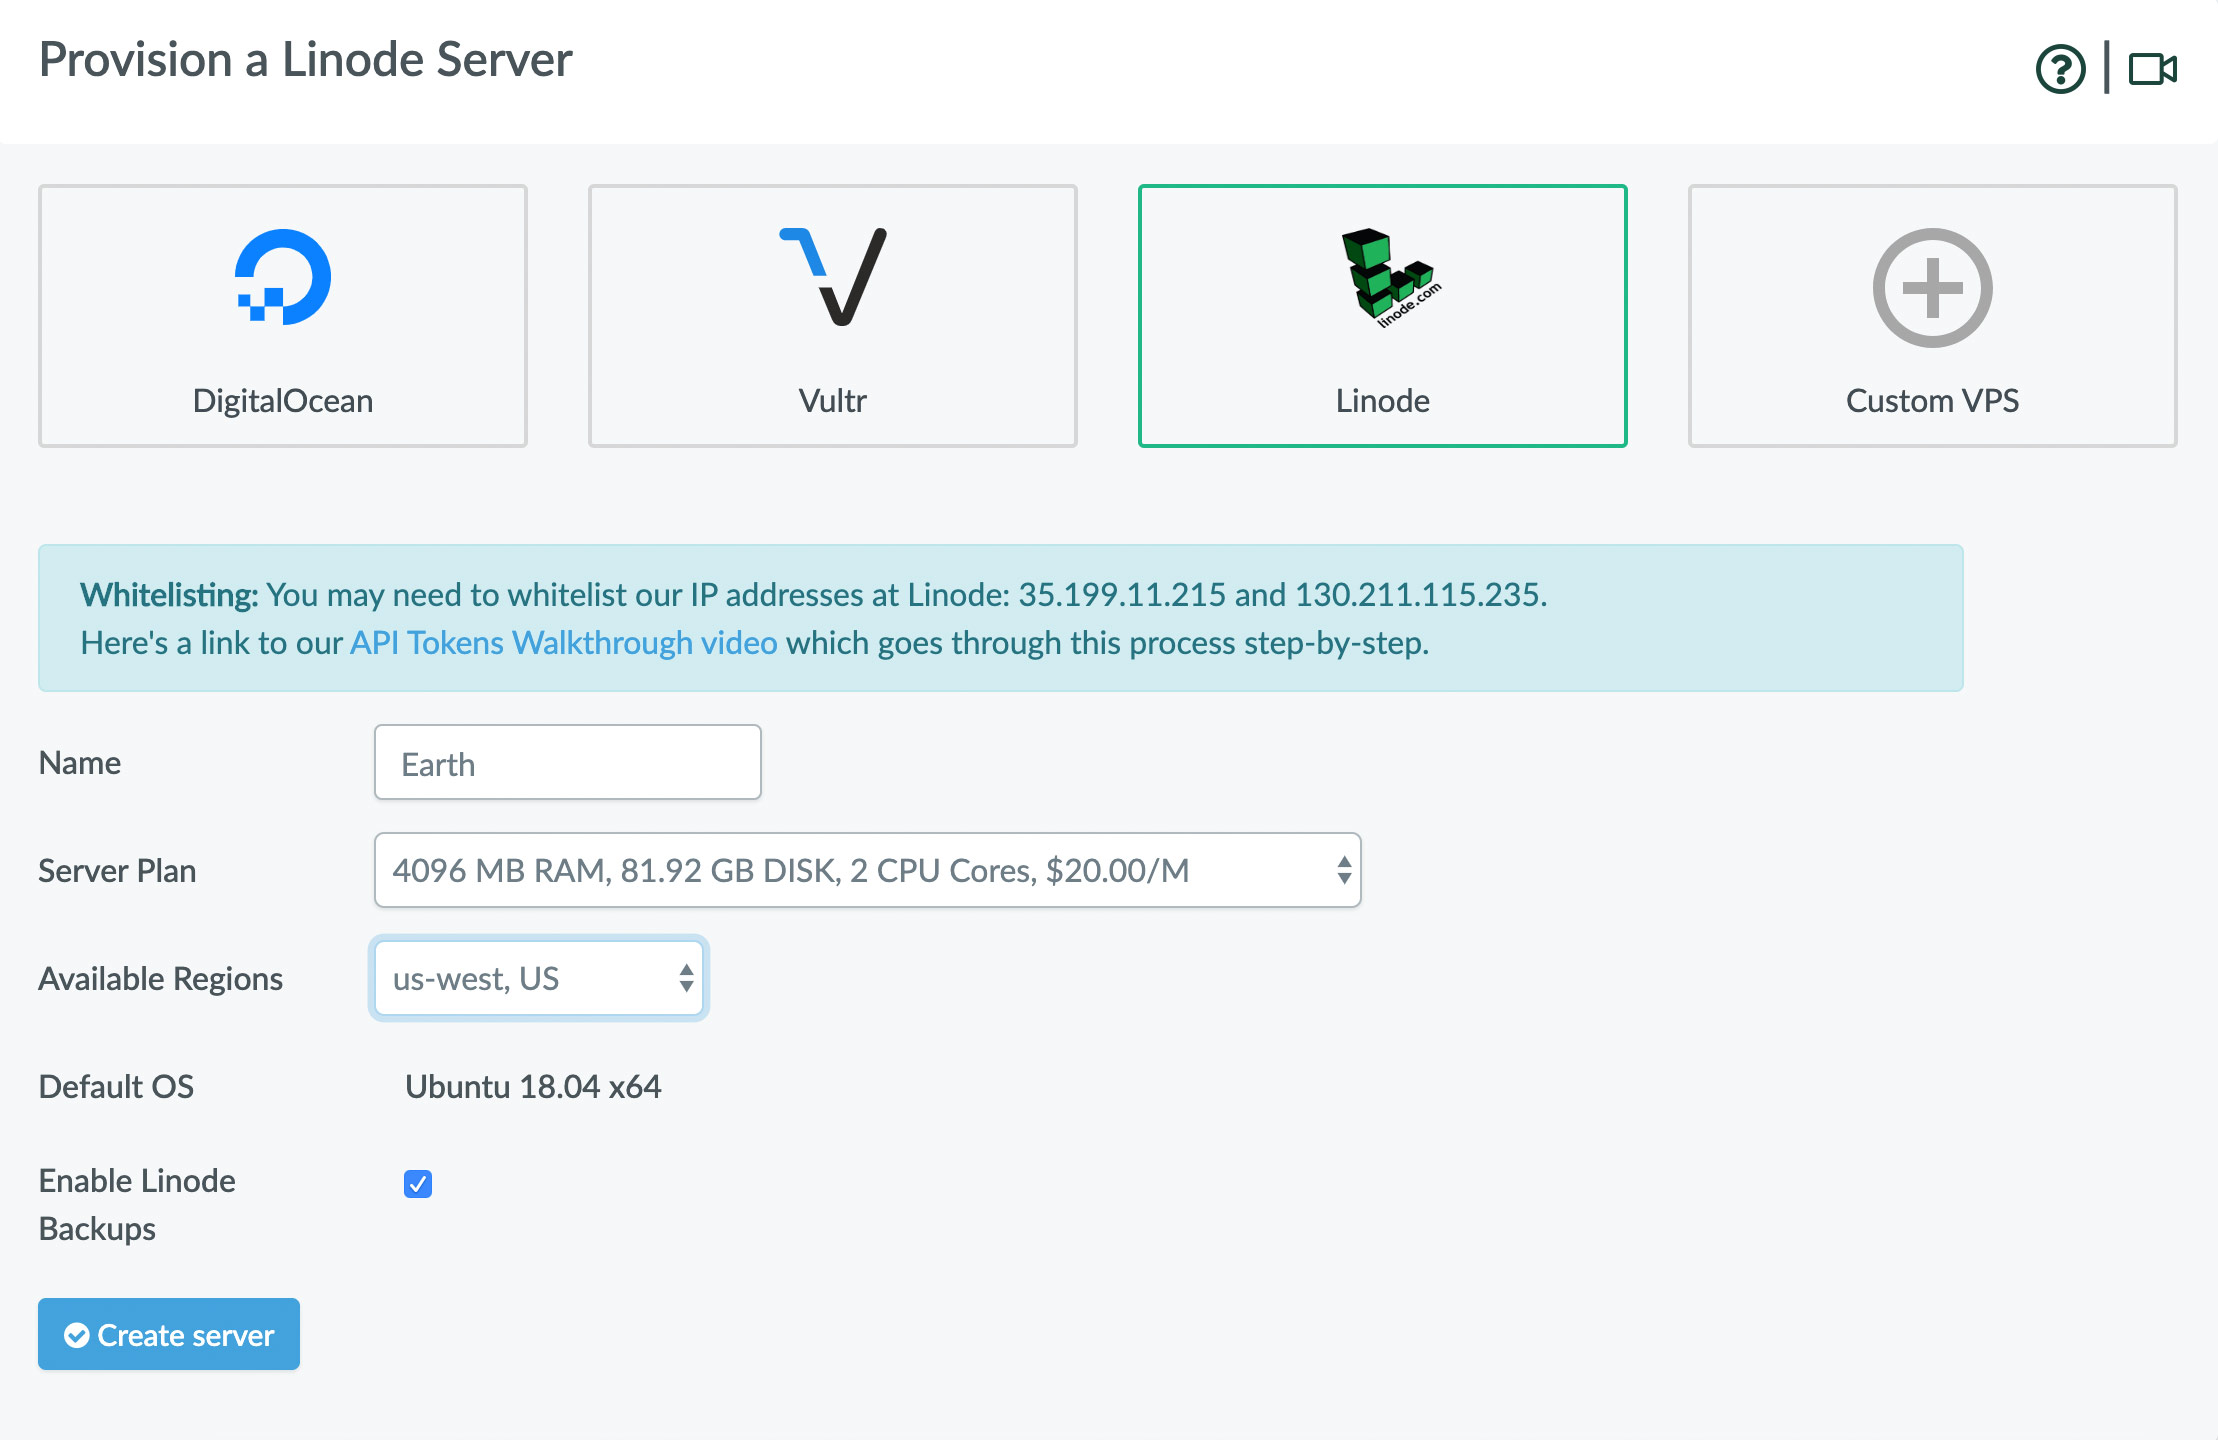
Simply name the VPS instance, choose your plan and region and create the server! When this completes you’ll see the server in your Linode account. I haven’t really discussed this yet, but Gridpane doesn’t own your VPS instances, you do. So if you were to cancel Gridpane at any time, you’d still have all of the servers at Linode.
So this one was a little new to me. I’m one of those admins who has always skipped SSH keys, and just used a good password for attaching to servers. However, Gridpane requires SSH keys to be used.
An SSH key is a pair of files. One is called the private key, and you should never give this out. The other is called the public key, and this key is what you upload to Gridpane.
I’m on a Mac. To generate an SSH key pair in OSX you’ll need to open terminal and type in the following command:
ssh-keygen -t rsa
Next you will be prompted for a passphrase. Give it a unique passphrase or hit enter to skip. Ideally, you want a passphrase in case someone were to gain access to your computer. You know, think a hotel room you leave it in. While you’re in the bathroom at the coffee shop, etc.
OSX has now generated a key pair and they are stored in the /Users/Your-Username/.ssh folder on your computer as as id_rsa and id_rsa.pub. Now you must copy the public key so that you can add it to your Gridpane account.
Type the following in Terminal:
pbcopy < ~/.ssh/id_rsa.pub
Your public key is not copied to clipboard.
Go to Your Settings > SSH Keys in Gridpane. Name the key and paste it in.
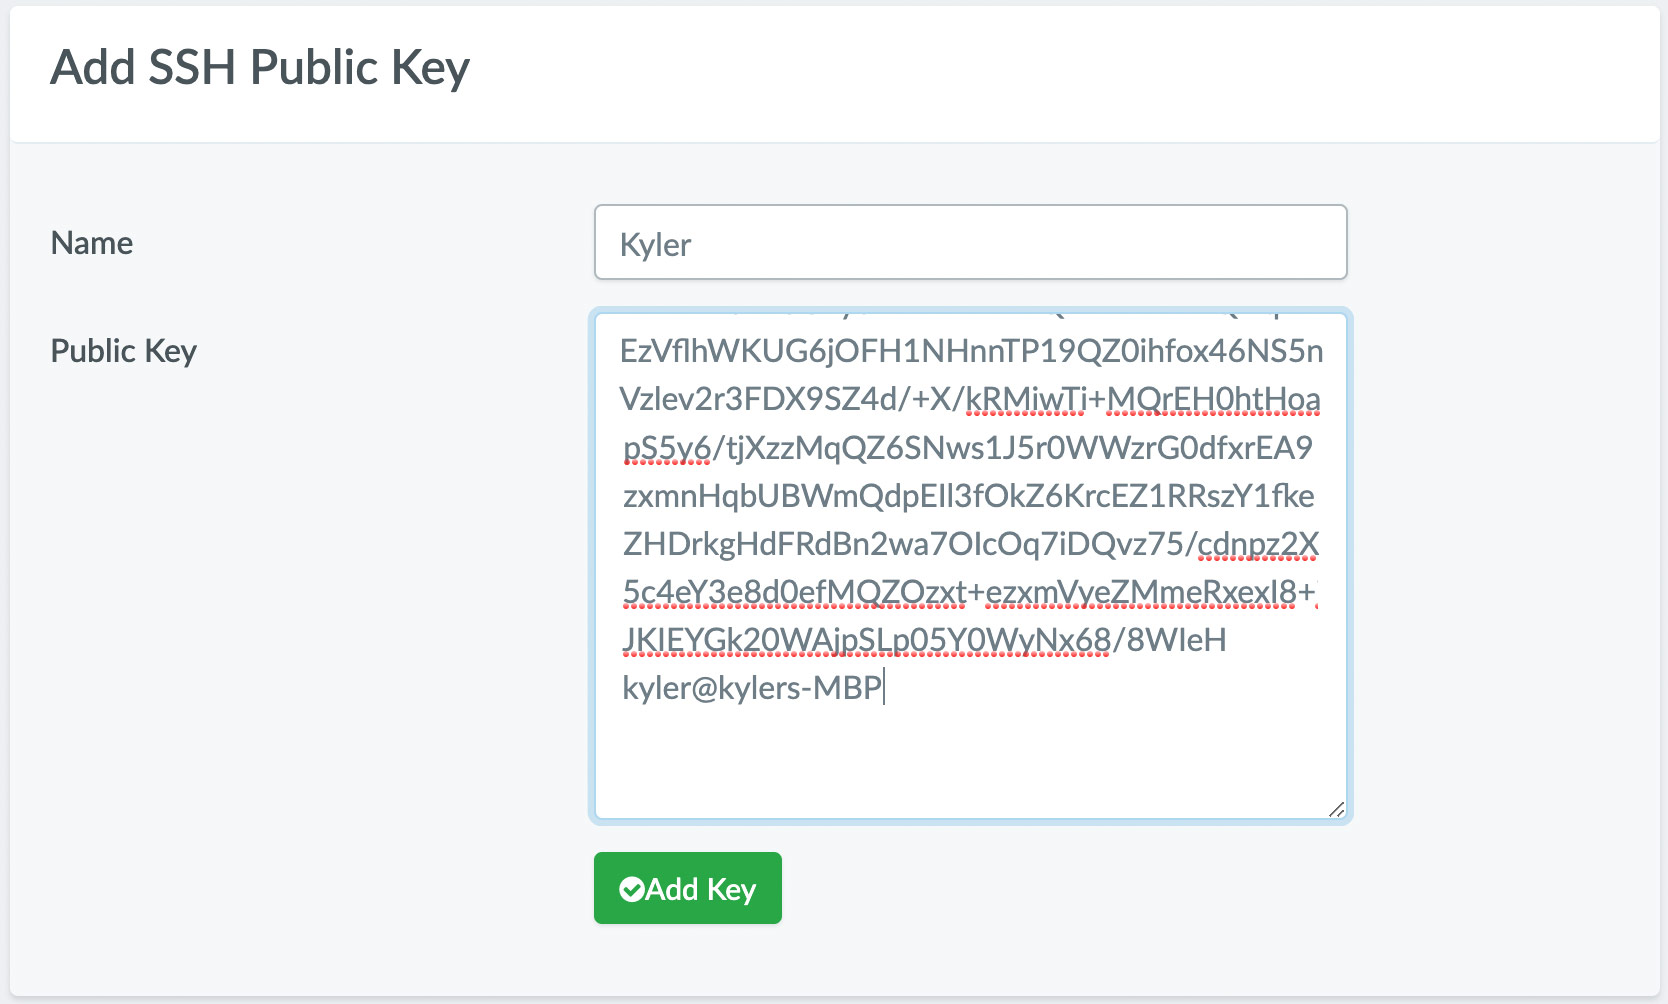
Note: Make sure your cursor is up next to the last line versus down on the bottom (see above). You will then need to turn the key on in the lower section of this same screen.
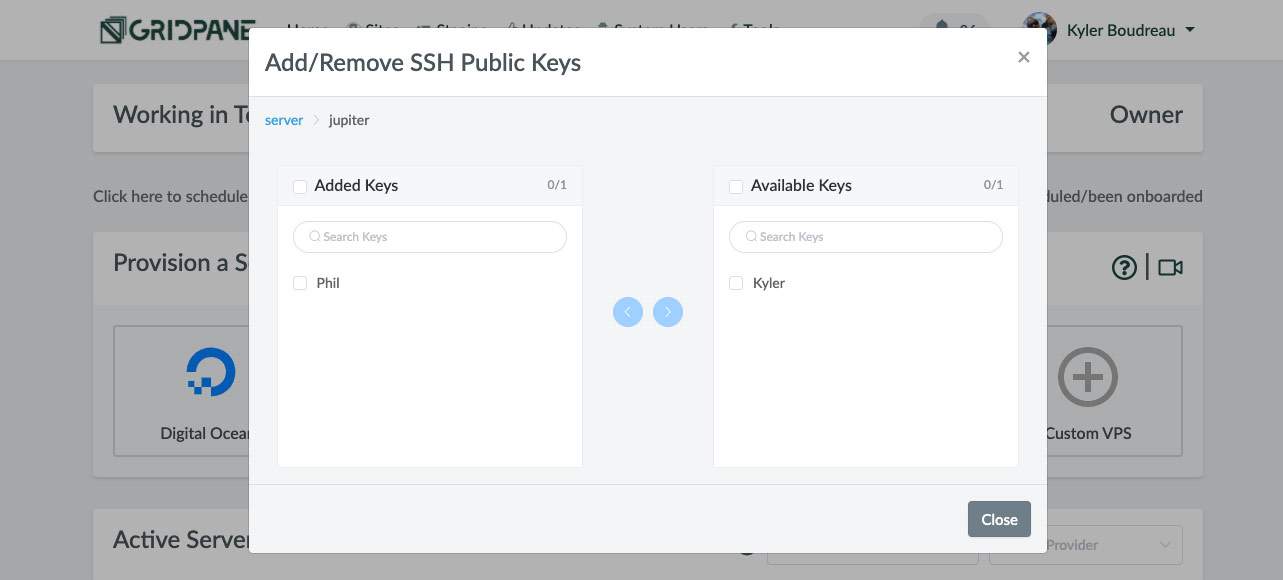
Within Gridpane, you can choose what keys have access to which servers. For example, maybe you have a contractor who only needs access to a single VPS, etc. Go to Gridpane > Home > Active Servers. Click the key icon next to a server, and add your new key to grant access.
Now if you attempt to access the server via SSH it will use the key and prompt you for the passcode you entered. Voila!
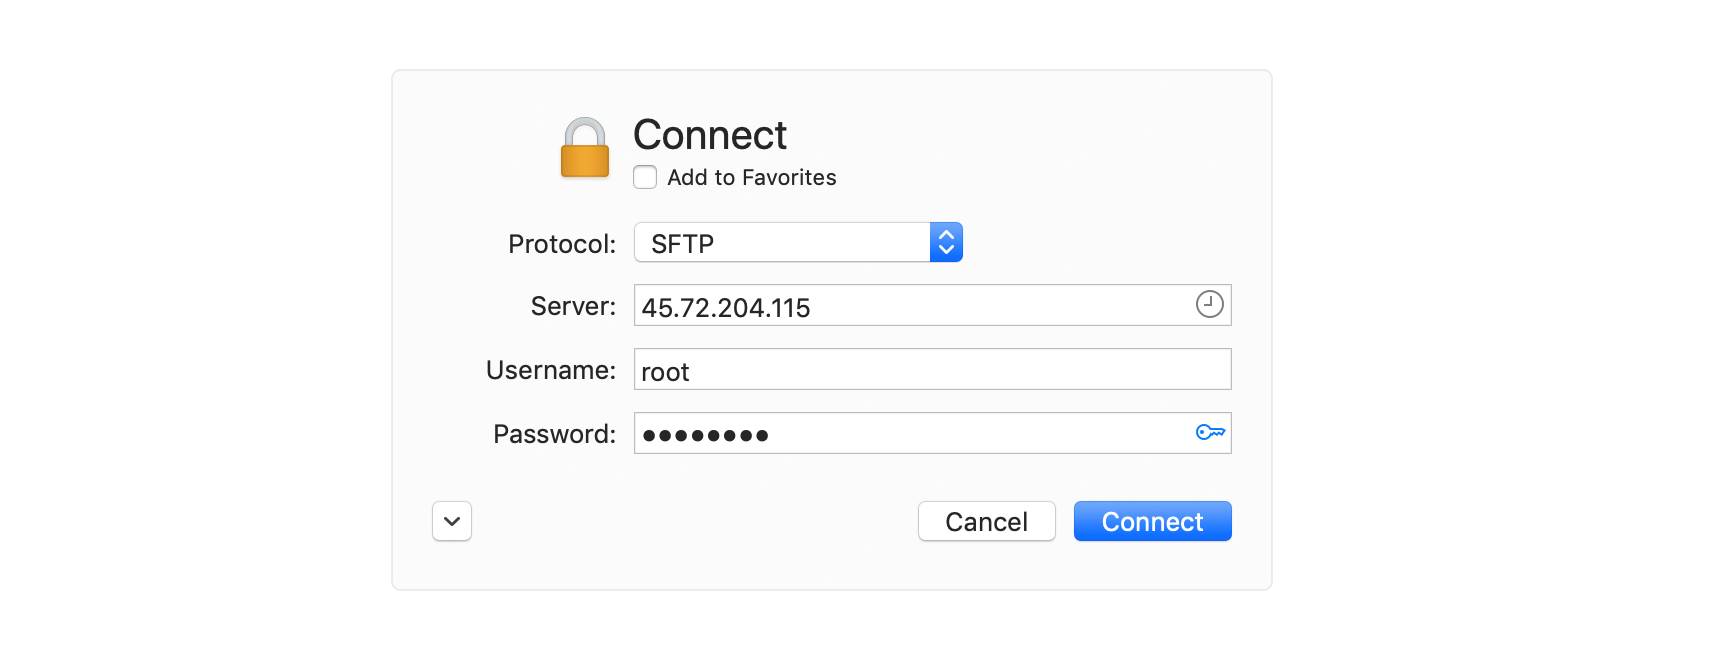
If you want to access your server with an sFTP client, you’ll now need to also use the key. I use ForkLift3 from Binary Knights. IMO it’s the best sFTP client out there. Like, if Apple built sFTP abilities into Finder, it would feel like ForkLift3.
In ForkLift click Go > Connect and enter the information (yes you’re connecting as root). You’ll need to click the key and browse to your /Users/Your-Username/.ssh folder. Choose the id_rsa key. Not the public one here — It’s your private key. Once done, the key will turn blue and you’ll be able to enter the passphrase you used in step 1.
Note: If you have problems connecting, uncheck the blue key but use the password you set on your secret key and try again. This will should make it work.
One pain-in-the-rear part of moving to Gridpane is the fact that your existing Linodes cannot just be moved in. It’s impossible. Now, you can setup a new Linode, import the sites and have Linode move the IP address.
For this next step, we’re going to setup a new Gridpane site, and then export and import from old to new. Ready?
Go to Sites from the top menu. Fill in the site URL, choose the server, system user and bundle (if using a bundle). Next you’ll need to uncheck Staging Site if you’re not doing one of those. Click Add Site!
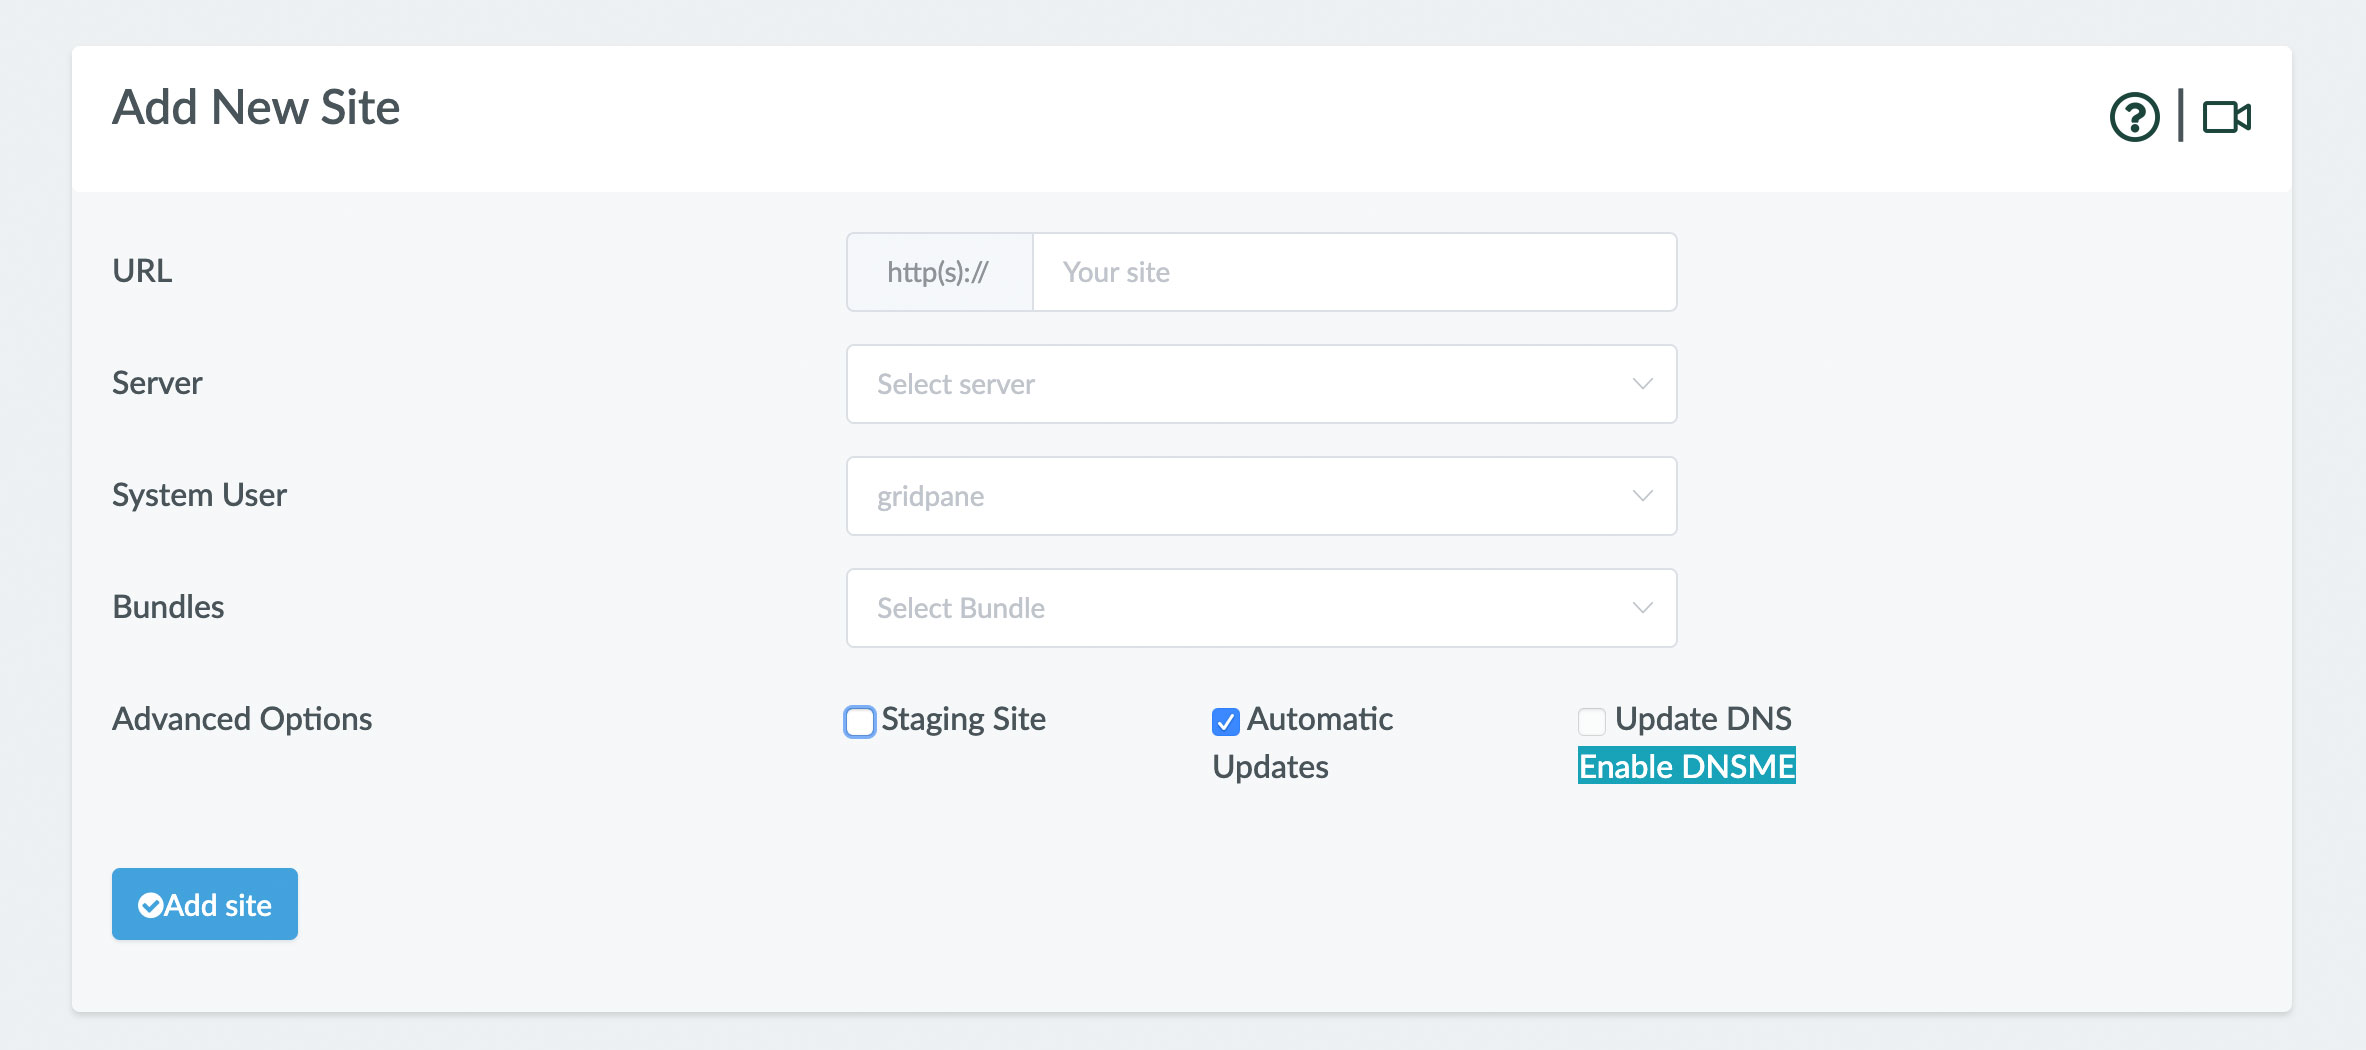
It’s that easy. No creating nginx server block files or Maria databases.
Sign into the site you’re moving and install the All in One WP Migration plugin. Once it’s activated, access it from the menu and choose Export > To File.

Once the export is complete, download the file. If you accidentally close the window before downloading the file, you can access the file from an sFTP client. Just look for a file with the wpress extension under the ai1wm-backups folder in WP-Content > Uploads.
Since public DNS is pointed to your old site, you’ll need to modify your local hosts file in OSX to correctly resolve to the new WordPress site. Go to Terminal and type in:
sudo nano /etc/hosts
It will open your local hosts file. Navigate to the bottom and then type your IP address + tab + the domain name. So if your Gridpane server IP address was 198.75.50.22 and your domain name was booyah.com, it would look like this:
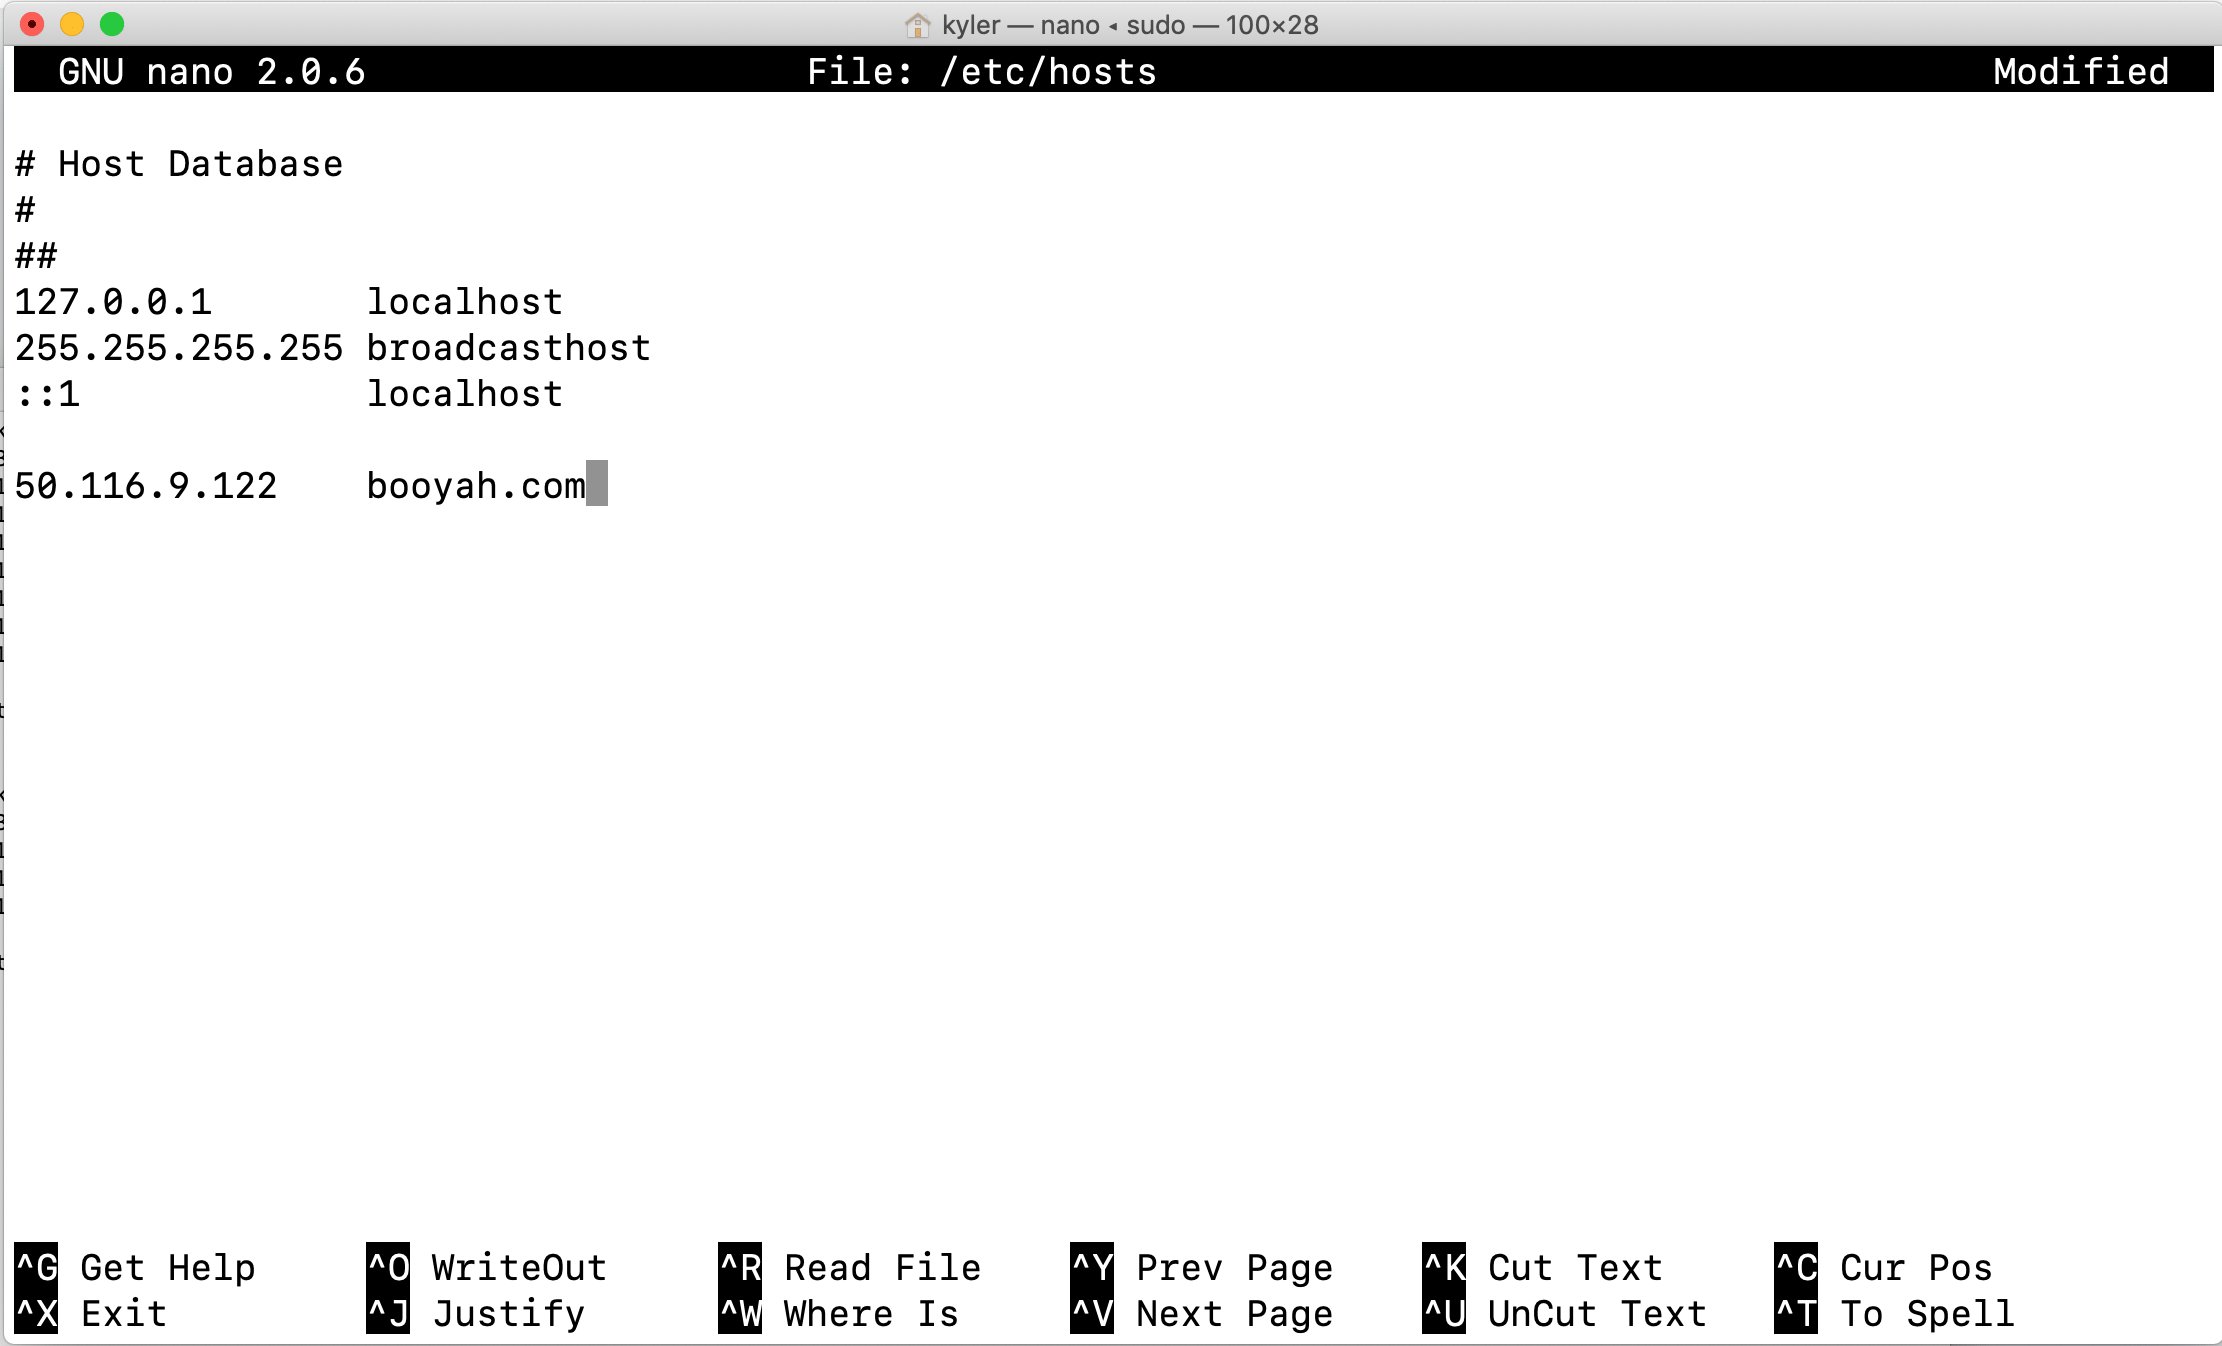
Hit Ctrl + X to exit and type Y to save changes. Now ping your domain name from terminal. It should give you the updated IP address.
Sign into your new Gridpane WordPress site. You can launch the sign on from within Gridpane (cool!) or do it the normal way. Remember, you’re using the global WordPress admin account you specified in Gridpane here.
If your current site has an SSL cert installed, your browser is going to try and use https when you access the new copy at Gridpane. This won’t work yet. Manually force your browser to go to http://yoursite.com/wp-admin and then you’ll be in business.
Install the All in One WP Migration plugin. This time choose Import from the menu. Browse to that file and import! Remember, if you forgot to download the file, simply use an sFTP client and access your old server. The file will be in the ai1wm-backups folder.
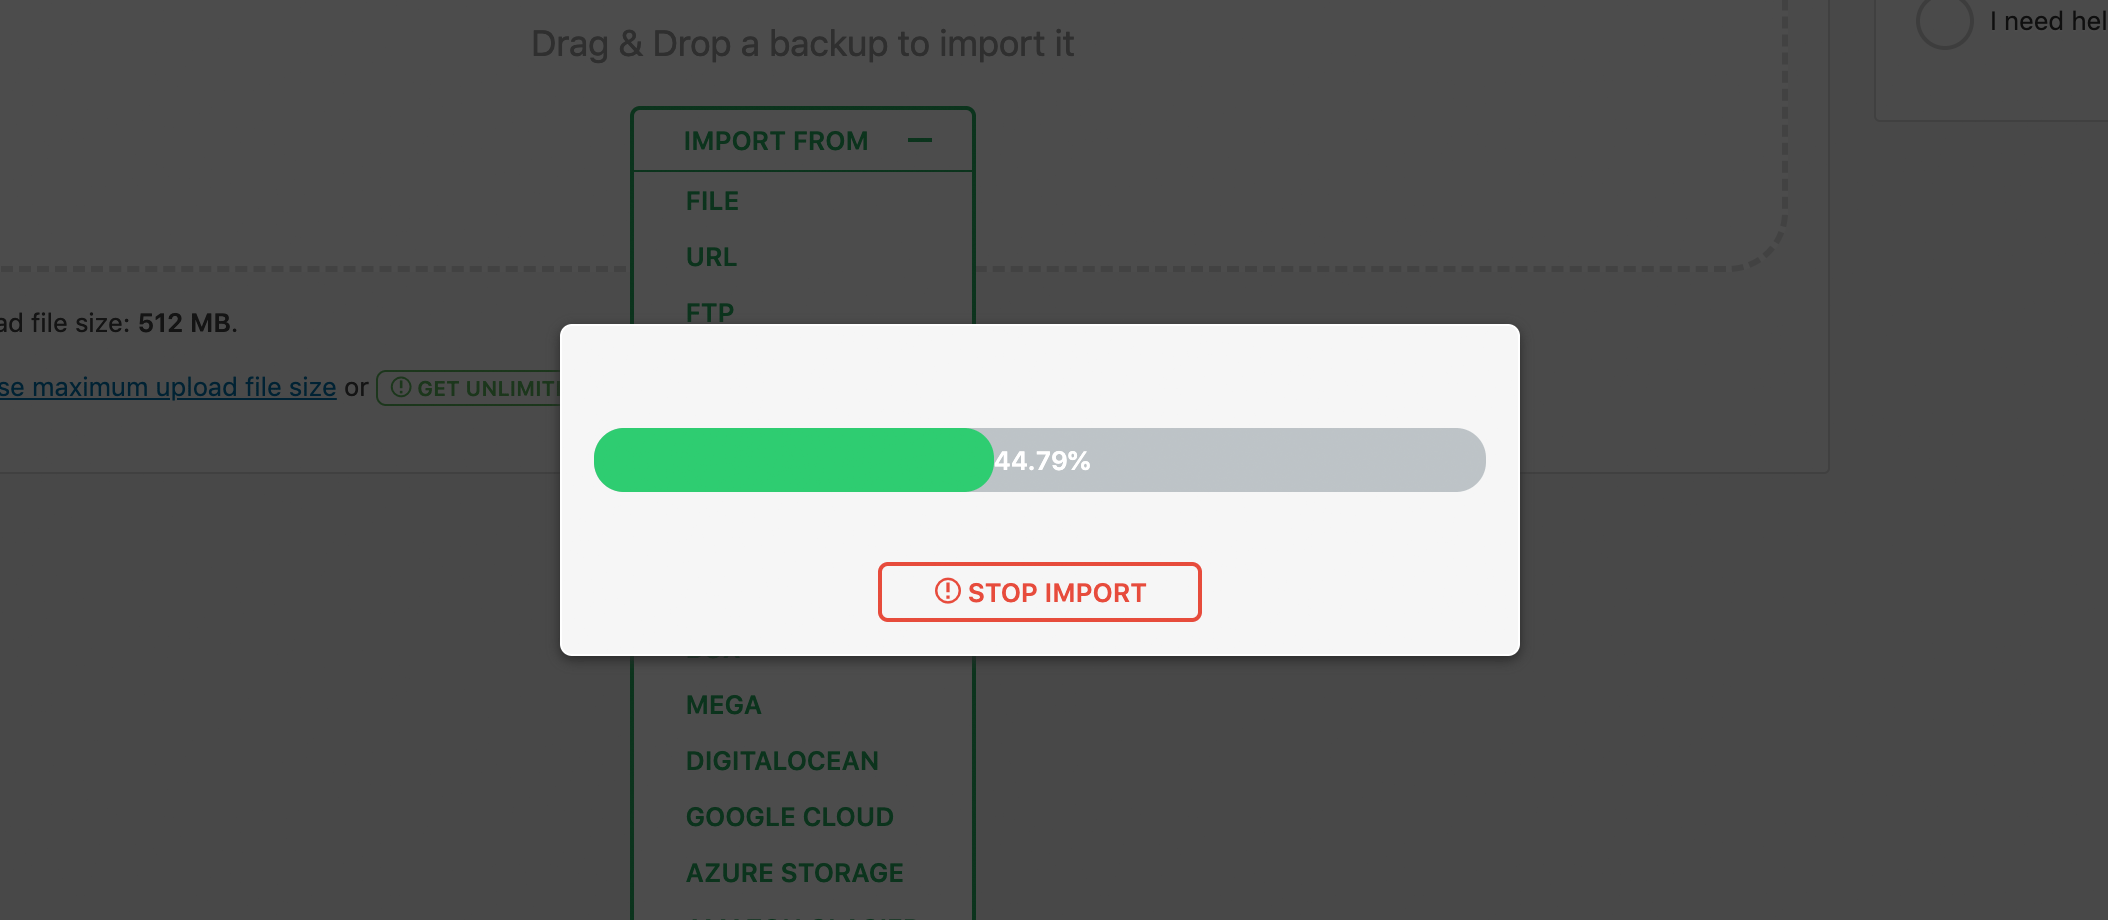
Note: If the site says the file you’re inputting exceeds upload limitations, you need to install a Pro plugin from All in One WP Migration. The good news is that Gridpane licenses them for you! Just click on any website within the Gridpane control panel and then click on the Downloads tab. You’re looking for the All in One Migration MultiSite Extension.
Once the import is complete it will prompt you about overwriting everything. When you click Proceed it will actually overwrite the data. Then click Finish on the final prompt.
Click Settings > Permalinks on the new site. It will make you sign in again. Sign in with the admin account on the original site you imported. Then go back to Settings > Permalinks unless it takes you there.
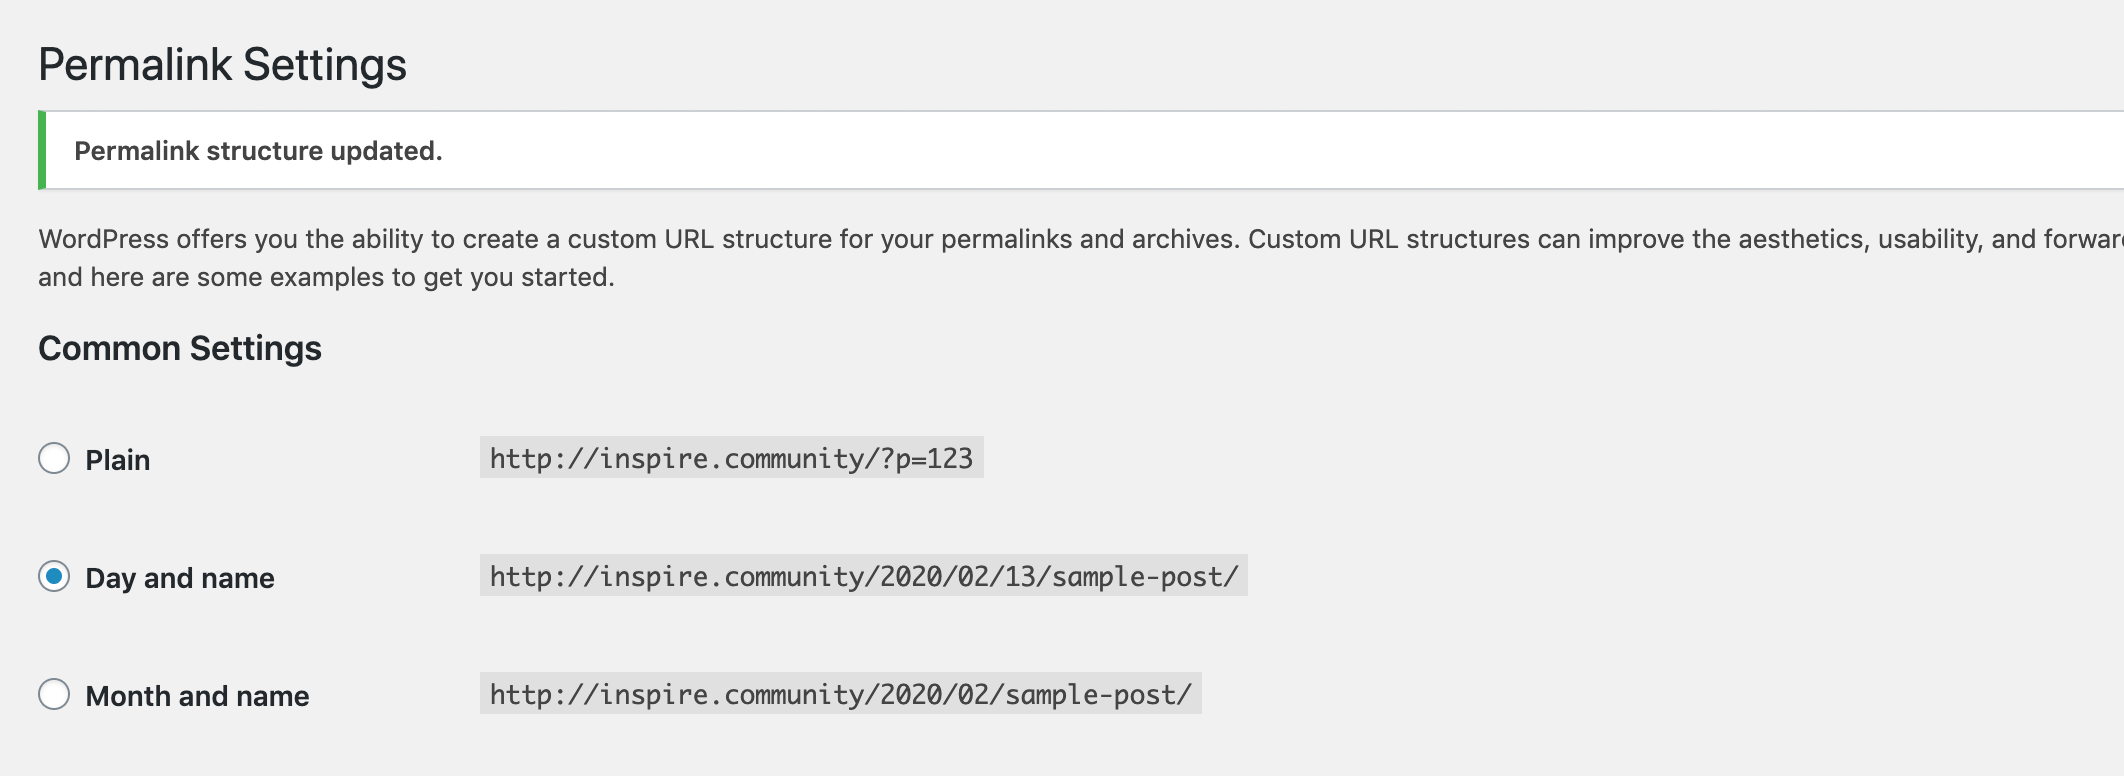
On the Permalink Settings page, scroll to the bottom and click Save Changes two times. You should see a Permalink Structure Updated message as shown below.
Your site is ready to go! Now you’ll need to change DNS to point to the new Gridpane IP address.
If you can spare a little downtime, I like to first transfer the DNS to Gridpane and setup the SSL and such before importing the site.
Once your public DNS is changed (and updated!) you can enable SSL within the site settings area under Gridpane > Sites. Simply click on the new Gridpane site and toggle SSL to on. If your DNS has updated, the Let’s Encrypt Certificate will work. If not, just give it some more time.
Now that your new WordPress site is ready, let’s setup object caching and page caching to make things really fly. But first I need to clear the confusion about something. Well, at least I was confused at first:
Nginx Fast CGI and Redis Static Caching are mutually exclusive. From what Gridpane has said, you need to use Redis page caching if your users are using certain plugins in WordPress like page builders as Fast CGI might not be compatible.
With Gridpane, Redis can cache both database queries (object cache) and additional page content. These are each enabled in different ways. To use Redis Object Cache, you’ll need to download and install the following plugin:
https://github.com/gridpane/gridpane-redis-object-cache
This is their own modified plugin that is more streamlined than what you’ll get from WordPress.org. Currently you have to download from Github, but they will be adding it to the WordPress repository soon.
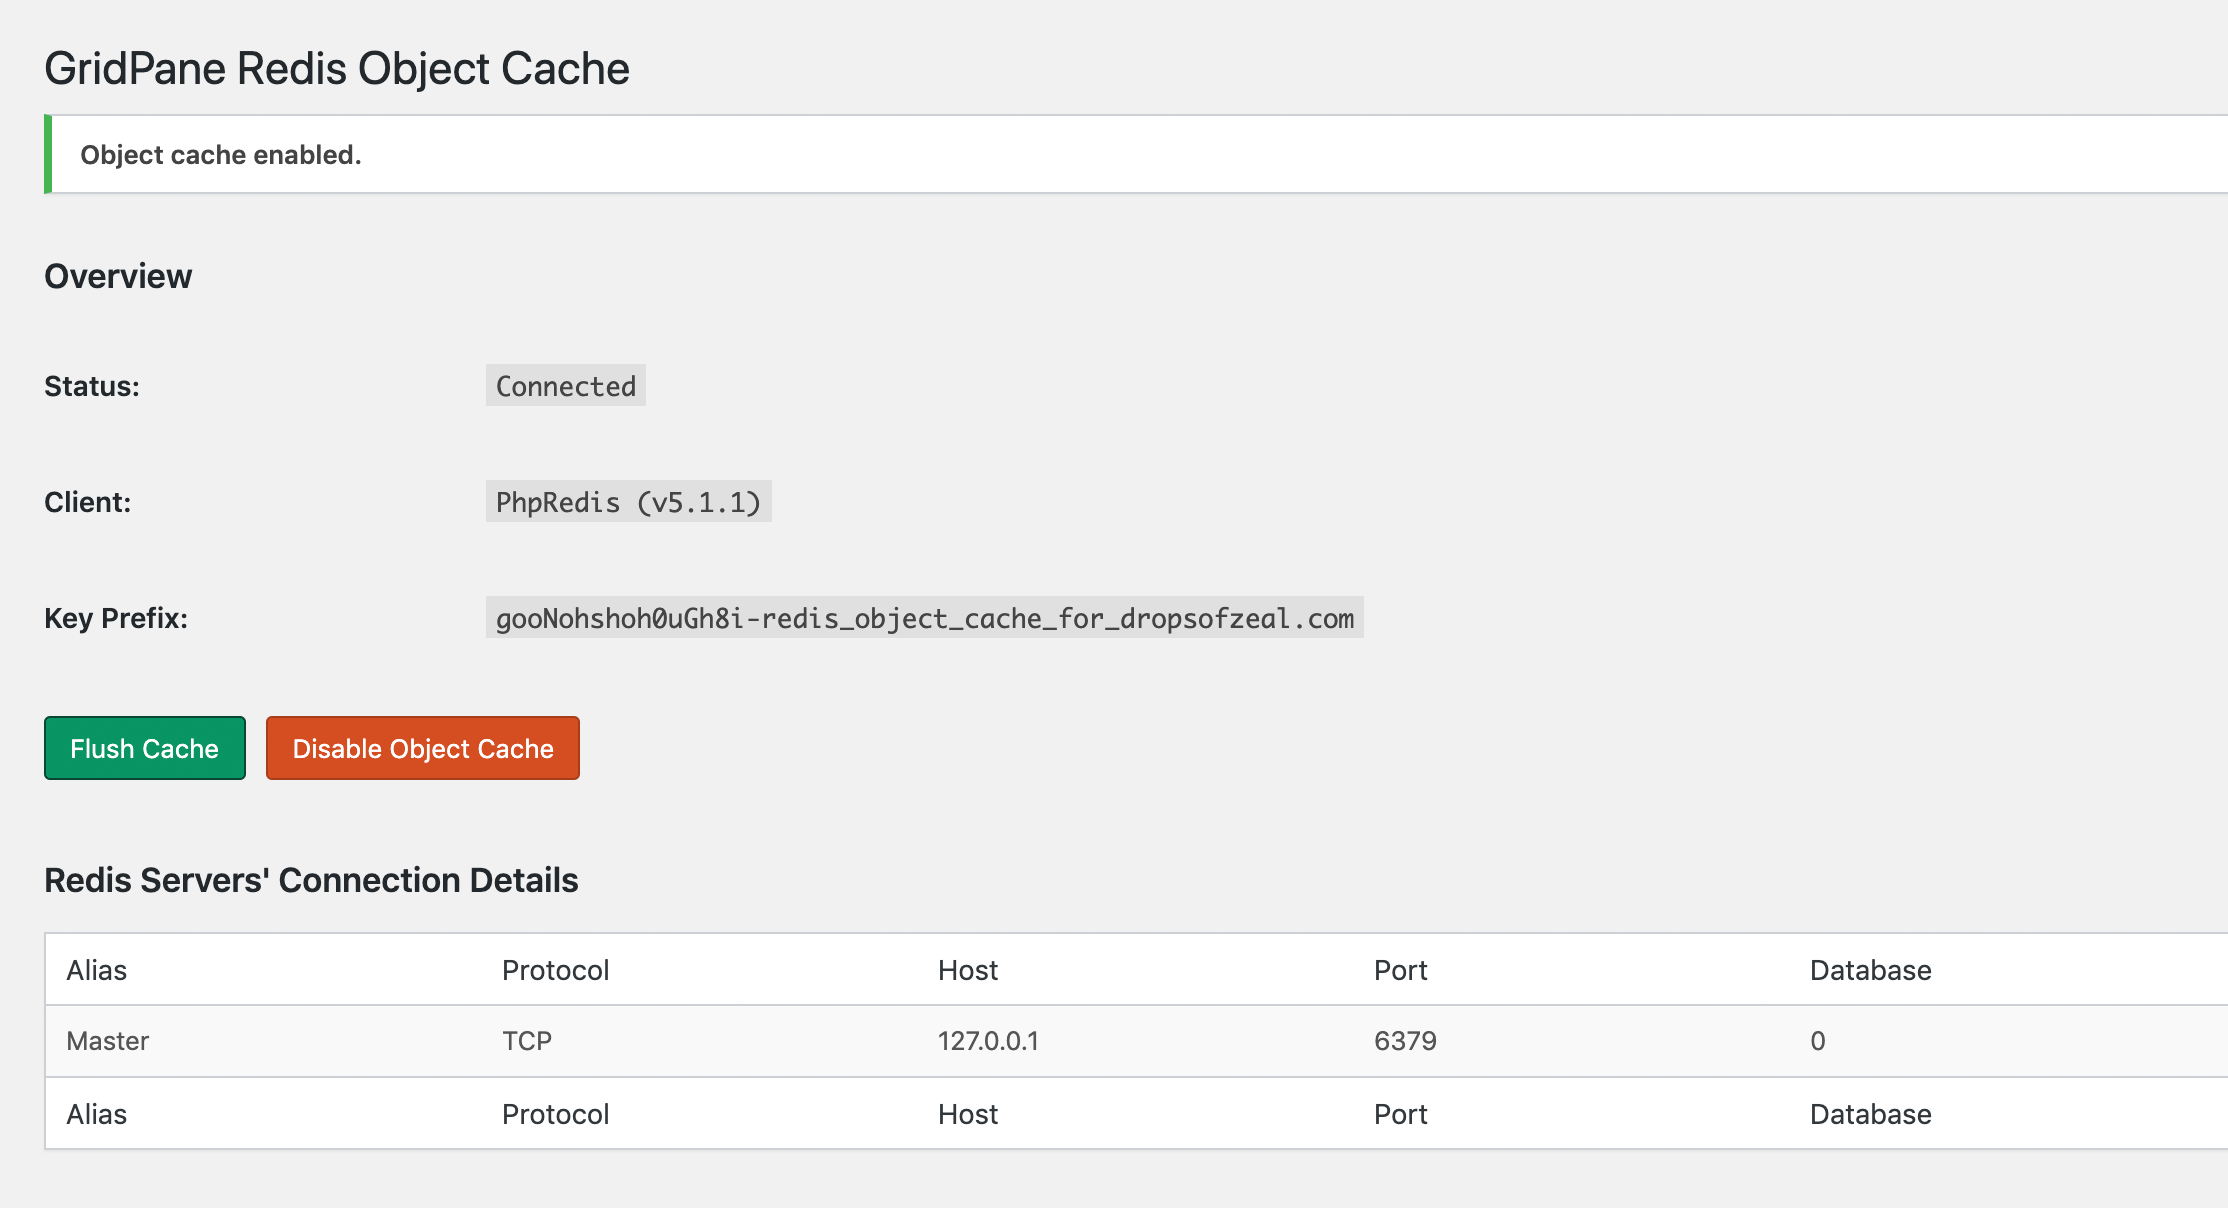
Once installed and activated, you’ll need to enable it under Settings > Redis Object Cache. Enable the cache, and then you should see it active as shown in the screen above. Read more about setup at Gridpane:
https://gridpane.zendesk.com/hc/en-us/articles/360033598631-Using-GridPane-Redis-Object-Caching
In addition to object caching, Redis can also do static page caching as well. I’m not using this as I use WP-Rocket for my caching, but if you do want to enable it, here’s how:
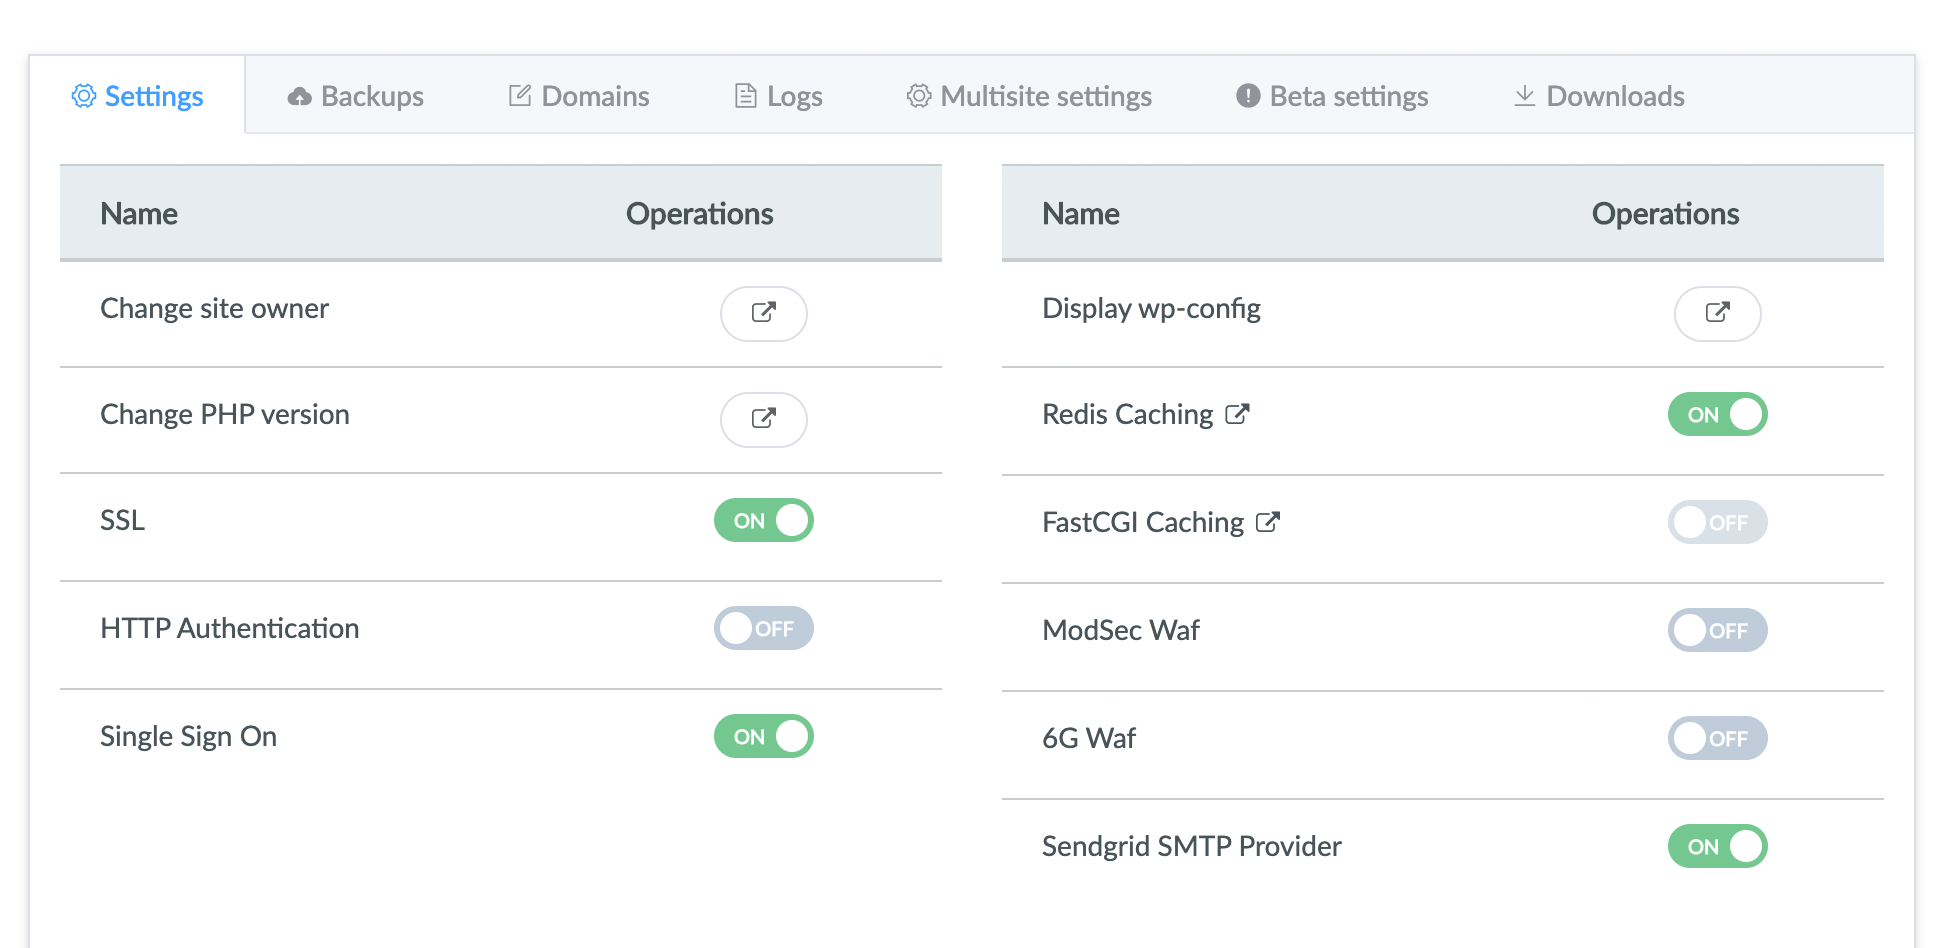
First, go to Gridpane > Sites and click on the site you’d like to cache. Toggle the Redis Caching option to On as shown below.
Next you’ll need to install the Nginx Helper plugin from the WordPress repository. This plugin also has settings. You can view instructions on proper configuration by visiting the Gridpane Support article here:
https://gridpane.zendesk.com/hc/en-us/articles/360033598811-Using-GridPane-Nginx-Redis-Caching
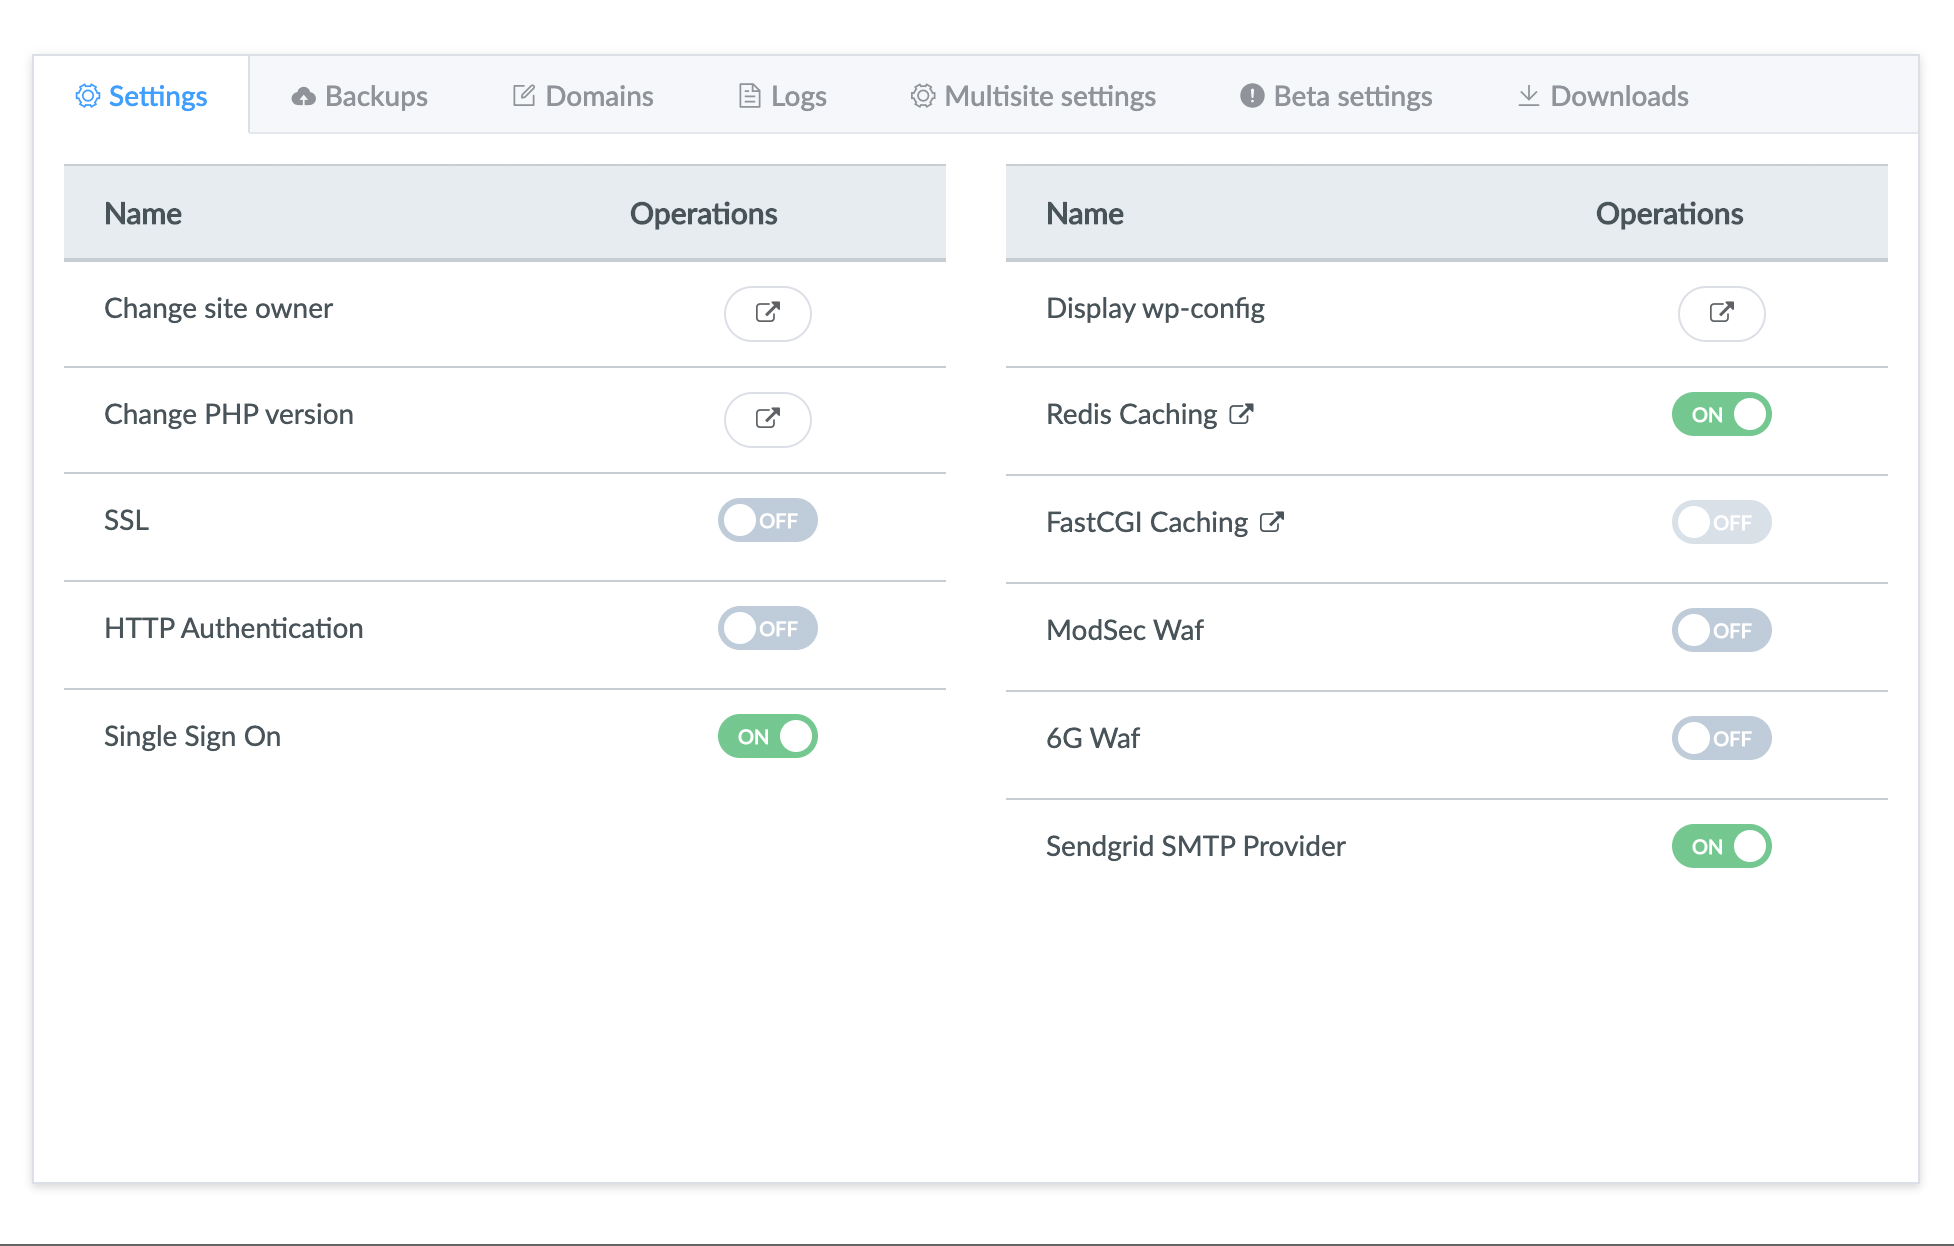
As mentioned above, Fast CGI and Redis Static caching are mutually exclusive. If you’re not using Redis you can enable Fast CGI under the same site configuration area shown in Step 2. You also need to add the nginx helper plugin. here’s an article with the details from Gridpane:
https://gridpane.zendesk.com/hc/en-us/articles/360033232392-Using-GridPane-Nginx-FastCGI-Caching
I plan to do some testing soon, but right now I’m using WP-Rocket for me static caching. I’m going to test it against Gridpane only caching and see which works better!
Always check your migrated site in a browser that you didn’t use to sign into the site. The reason? Even if you turn off the Redis page caching, it is on be default. I’ve had my Gridpane server only show the WordPress 2020 theme after migration due to caching, and nothing I did on the site helped. If you run into this, simply go to Terminal and type in: gp cache fix yoursite.com.
If you’re like me, malware protection was one of the perks that got me considering Gridpane to begin. However, you must install it yourself on servers, and then run it occasionally. You can learn more about linux malware protection for dev plans in the Gridpane KB.
Boom! You’ve done it. Hopefully this has helped someone navigate a few startup issues with moving to Gridpane. Overall, I’m loving the service, and can’t wait to get all of my VPS servers under the Gridpane hood!


Sometimes it's my latest film. Or a new review. Maybe a write-up on fly fishing? What I can promise is that it'll be good!