Like most modern site configurations I have a main url, and then a client dashboard/community at a ‘my’ sub domain. The sub domain site is where BuddyBoss lives. It’s also where I collect enrollments for the school.
After trying Mighty Networks and Circle.so I decided that BuddyBoss was the way to go for the all-new for 2023 Write & Direct Film School.
So far? Love BuddyBoss.
Like most modern site configurations I have a main url, and then a client dashboard/community at a ‘my’ sub domain. The sub domain site is where BuddyBoss lives. It’s also where I collect enrollments for the school.
As you can imagine, my primary site is themed completely different than BuddyBoss. And though the BuddyBoss theme offers a plethora of options to customize the look and feel, I wanted the enrollment page on the ‘my’ subdomain to be identical in look and feel to my primary site. For me, this is a better user experience.
So I needed to customize the BuddyBoss theme outside of the normal parameters, and create a completely blank page that would allow header to footer styling. The first step to accomplish this is activate the BuddyBoss child theme.
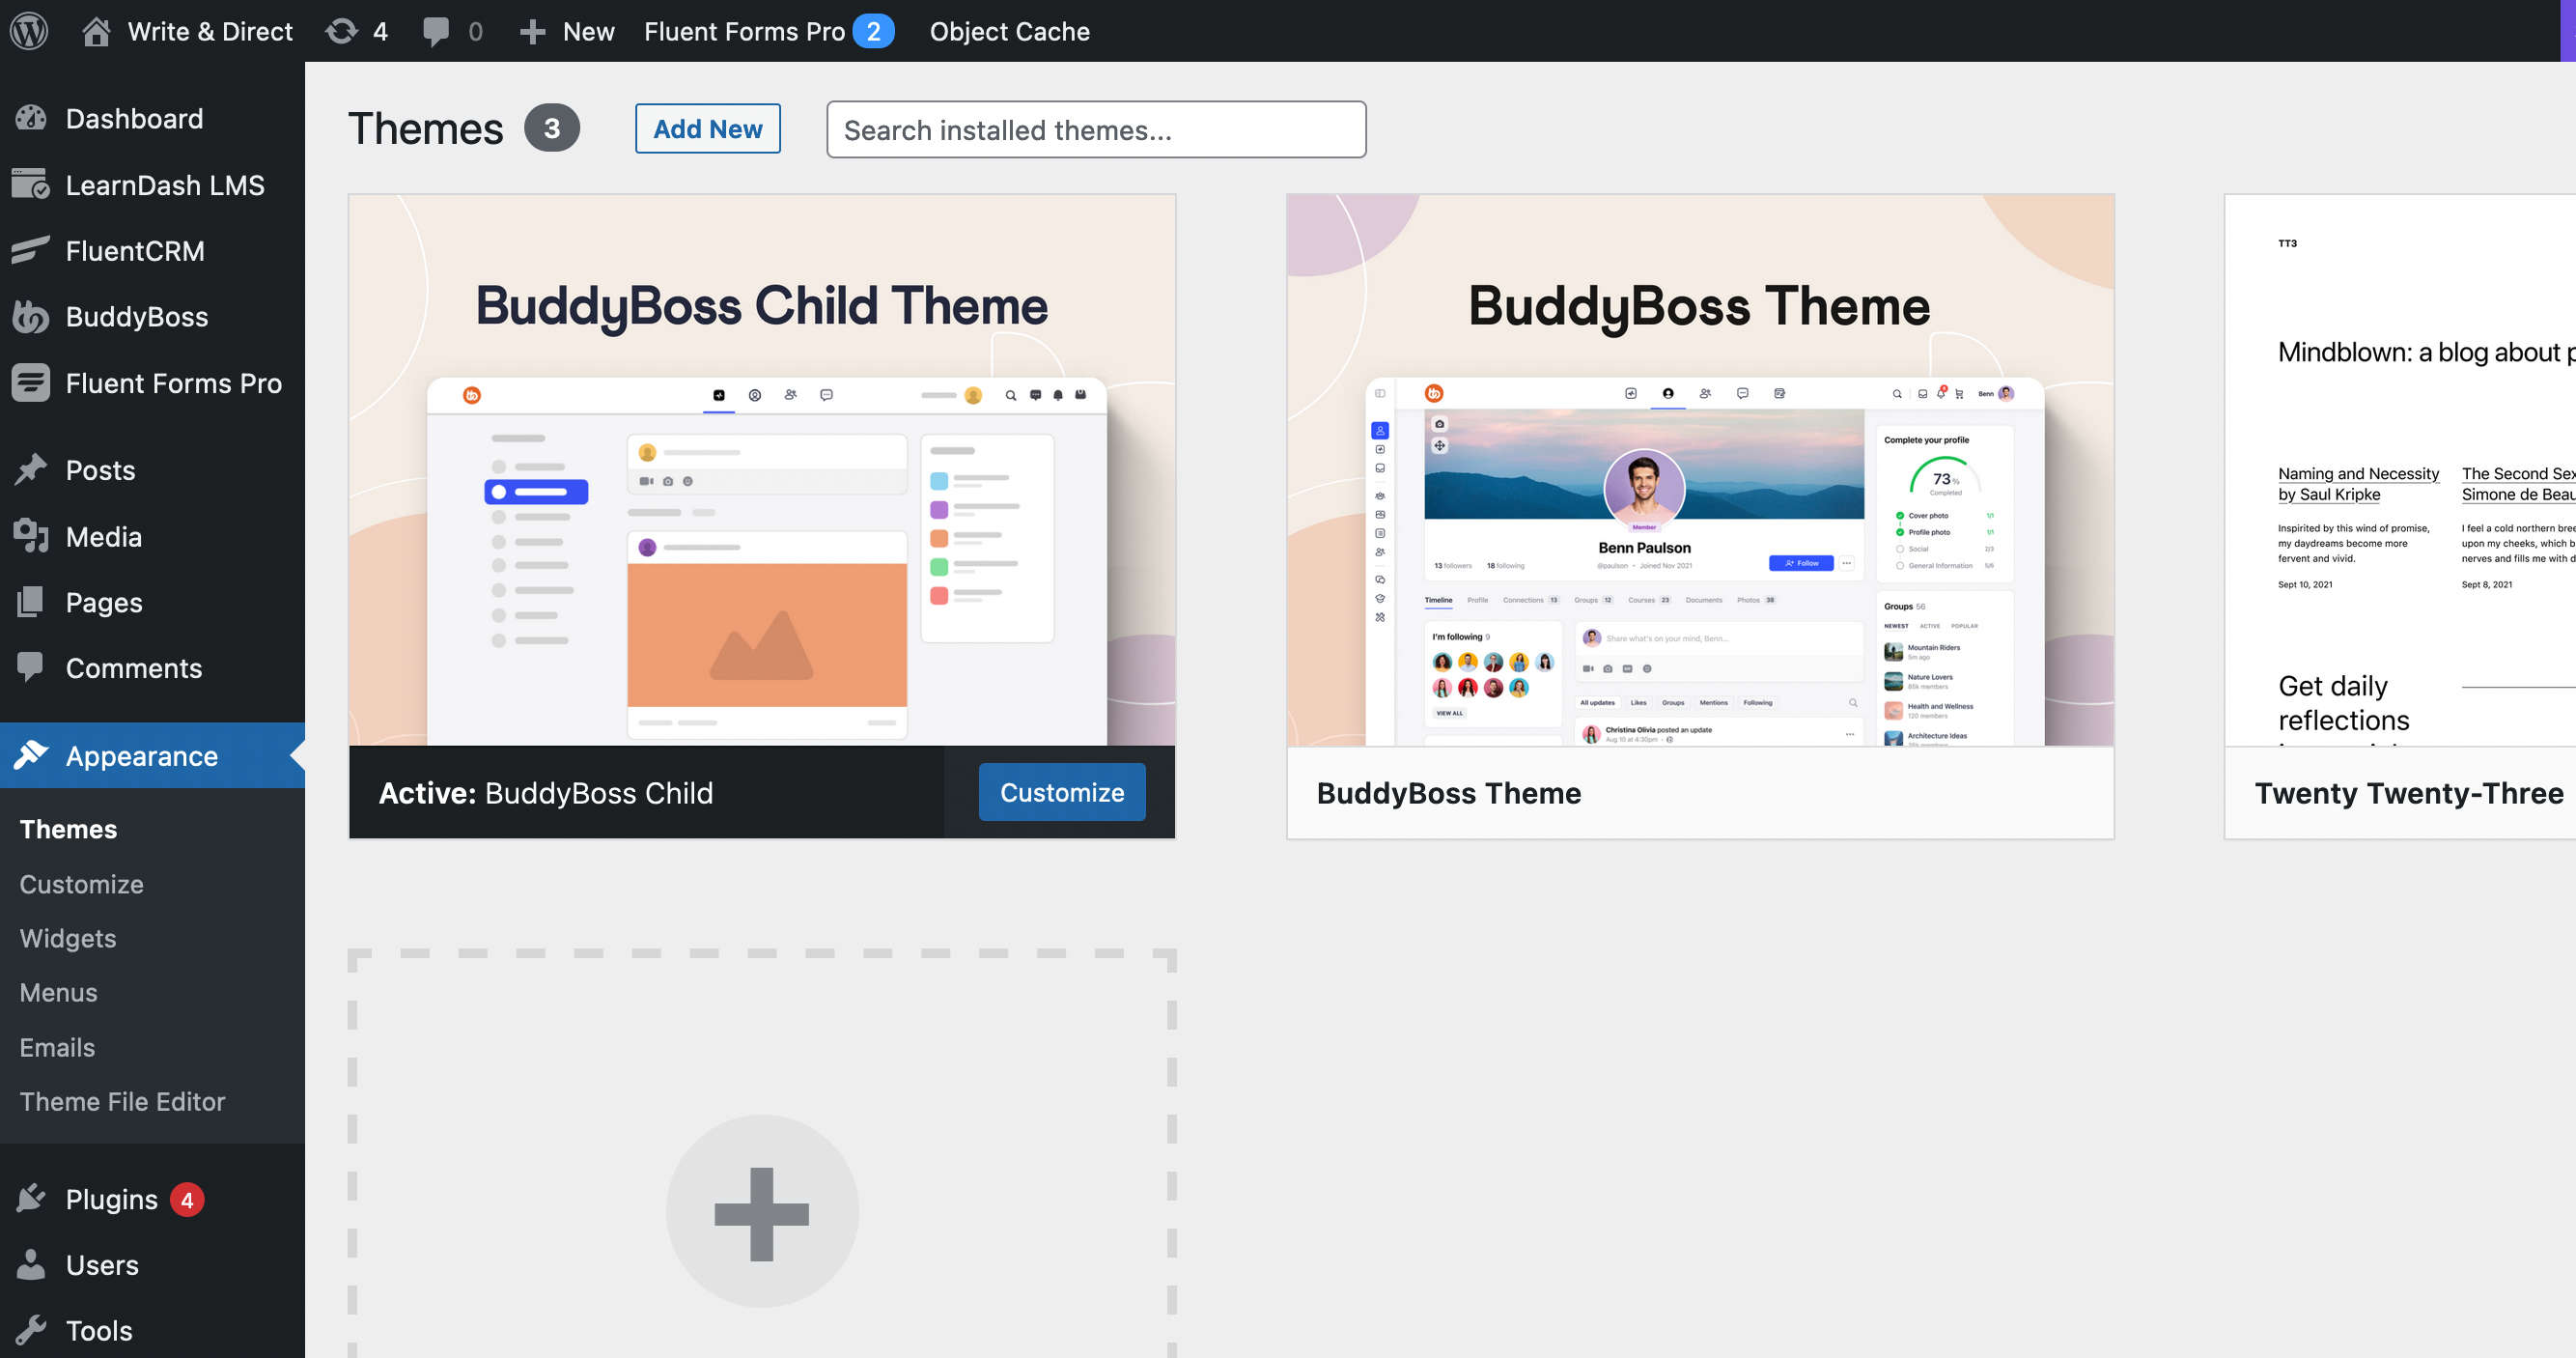
BuddyBoss provides a child theme out of the box which makes it easier to add custom styling to aspects of your BuddyBoss site. Simply activate the child theme and with your sFTP client, browse to the /wp-content/themes/buddyboss-theme-child folder. In this folder you’ll find items like functions.php, screenshot.png, etc.
You can add your own PHP functions to the functions.php file, change the theme image in the WordPress Admin by replacing the screenshot.png file — You get it. I’m not going to dive into child theme possibilities here.
Let’s get onto styling a page to match my primary site.
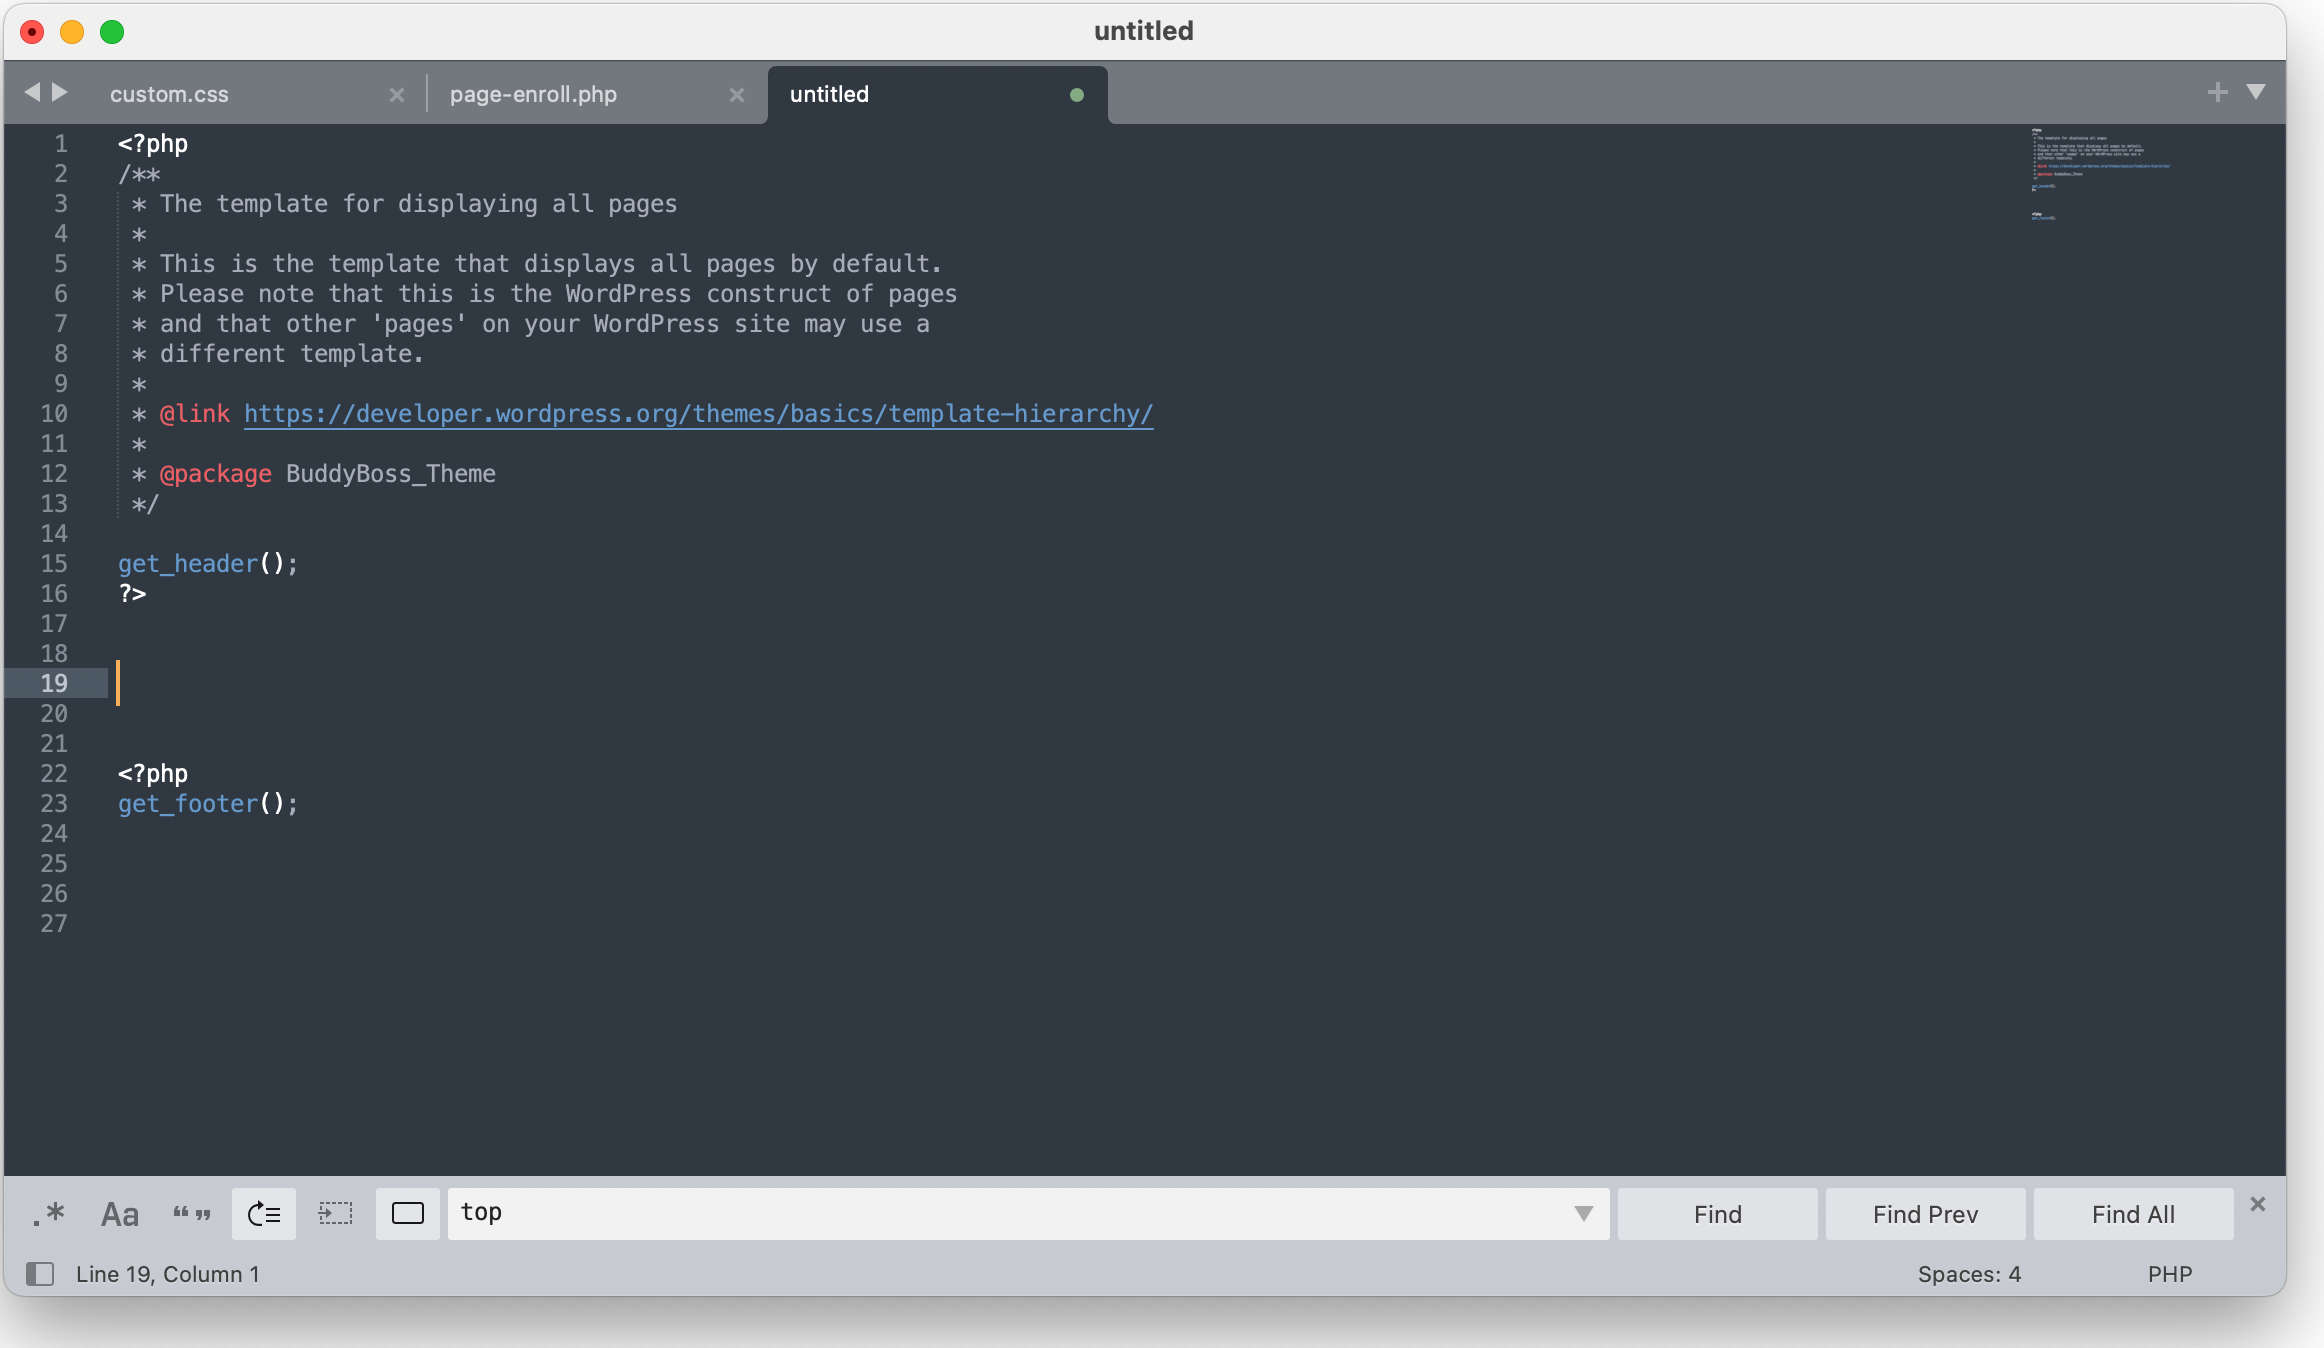
My registration page on the BuddyBoss site is called ‘enroll’. To customize this page I simply create a page-enroll.php file and drop it in the root of the child theme. The contents of the PHP file should look like this (download it here):
When I created my blank page and added content, it worked. But I couldn’t change the header and footer of the page to match my primary site. And this didn’t work for me.
Reached out to BuddyBoss support and asked them for a way to have a completely blank page without including their styling in any way. They don’t have that option. So, it was off to the wild wild west of overriding CSS with !important declarations. Not ideal, but guess what? It works.
In the assets > css folder (in the BuddyBoss child theme) you’ll see a ‘custom.css’ file. This is the file for customizing your CSS.
I’m not saying this is the only way to do this. For example, you could play around with creating a template that you choose from the admin, etc. But that route wasn’t working for me in this scenario.
With that said, simply create the page you want to style in the WordPress admin (if you haven’t already). Make sure the permalink matches the name you give your PHP file.
In the top of the WordPress admin (with the page in edit mode) look for “post=” and a number. That number is your page ID. Jot that down.
Next add the lines below to the custom.css file. *Note: Use your page ID number instead of 877.
/* buddy boss mods */
.page-id-877 #content{padding:0 !important;margin:0 !important;width:100% !important;}
.page-id-877 .site-content{padding:0 !important;margin:0 !important;width:100% !important;}
.page-id-877 .container{padding:0 !important;margin:0 !important;width:100% !important;max-width:100% !important;}
.page-id-877 .bb-grid{display:block !important;}
.page-id-877 .site-content-grid{padding:0 !important;margin:0 !important;width:100% !important;flex:0 1 100% !important;}
.page-id-877 img {padding:0 !important;}
.page-id-877 .buddypanel {display:none !important;}
.page-id-877 #page {margin:0 !important;}
.page-id-877 .site-header-container {height:0px !important;position:fixed !important;margin:-100px 0 0 0 !important;}
.page-id-877 .footer-bottom {display:none !important;}
This will move the BuddyBoss header off the page and completely hide the footer. You can also do a display:none on the site-header-container if you’d like.
This CSS removes margins, spacing, hides the BuddyPanel and changes the .bb-grid class to not display as flex box. That’s a huge one as your content that you add in the next step will not look right until .bb-grid is set to display:block.
Now you can add your own header, main content and footer using the same styling from your primary site! Of course the actual BuddyBoss header and footer is being processed, which includes the WordPress loop, etc. We have just hid them.
You can check out both of my pages and see how they now match up:
https://writedirect.co/film-school-details/
https://my.writedirect.co/enroll/
As mentioned, there could be other ways to customize the BuddyBoss theme and create your own blank template page, but for my scenario this gave me what I needed. Obviously you could add other page-name.php template files, grab the ID and add to your CSS. Or try creating a template to select from the admin. As mentioned, I had issues with that route and BuddyBoss.
As you may or may not know, I'm a filmmaker by trade. And something is in the works that might interest you or someone you know! It's called Write & Direct, and if you want to make movies, it's your inciting incident. It's your catalyst in the journey of becoming a filmmaker. There's nothing else quite like it.
Launch date: Summer of 2023. Enter your name and email to find out more!


Sometimes it's my latest film. Or a new review. Maybe a write-up on fly fishing? What I can promise is that it'll be good!