Shooting with an anamorphic lens on your iPhone? Cutting in Avid Media Composer? This will guide you through the steps to get it done right.
When I went to film school we shot on mini DV. Now I have an iPhone that can shoot 4K footage. It’s insane. Of course, 4K from a phone isn’t anything like 4K from a Black Magic or RED, but it’s great for short films and more!
Story tellers using the medium of movies for their art typically want 24 frame footage, shutter speed and white balance control, focus control along with 4K footage with an anamorphic frame size.
iPhones can’t do all of that.
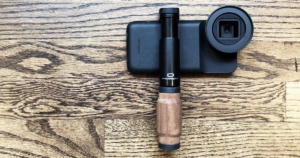
The good news? The Moment Anamorphic lens combined with the Moment Pro iPhone app will deliver. You can shoot 4K anamorphic footage at 24 frames while controlling shutter speed, aperture, white balance and focus. DUDE.
When Moment announced their new anamorphic lens, it didn’t take me too long to spring for it. But when I started prep for my first short film with the new setup, I realized there was a small learning curve for post.
My editing tool of choice is Avid Media Composer. I’ve cut three feature length films and who knows how many short films in Avid. Love it! Avid is stable, used by the industry pros, and it just makes sense.
Here is a 100% tested workflow to get your iPhone 4K anamorphic footage into Avid Media Composer. This assumes the following:
HEVC vs H.264. Remember that HEVC is about smaller file size, not better quality -- At least from what I've read. Also, Avid MC doesn't support HEVC files. Obviously that could change in the future. If you do shoot HEVC, you can run them through Compressor and convert to ProRes which Avid can then work with.Smooth post production begins with good media management. Trust me – you do not want to rush this part.
We’ll be AMA linking the footage in Avid vs importing it. Back in the day of DV tapes from the lab, importing was obviously the easiest and only option. But with with various high resolution formats, AMA linking is the ticket.
I recommend you create a separate folder outside of Avid MediaFiles called Avid Original Media. Then create sub-folders for each project you work on, with consistent naming applied to project sub folders (raw, sound, etc).
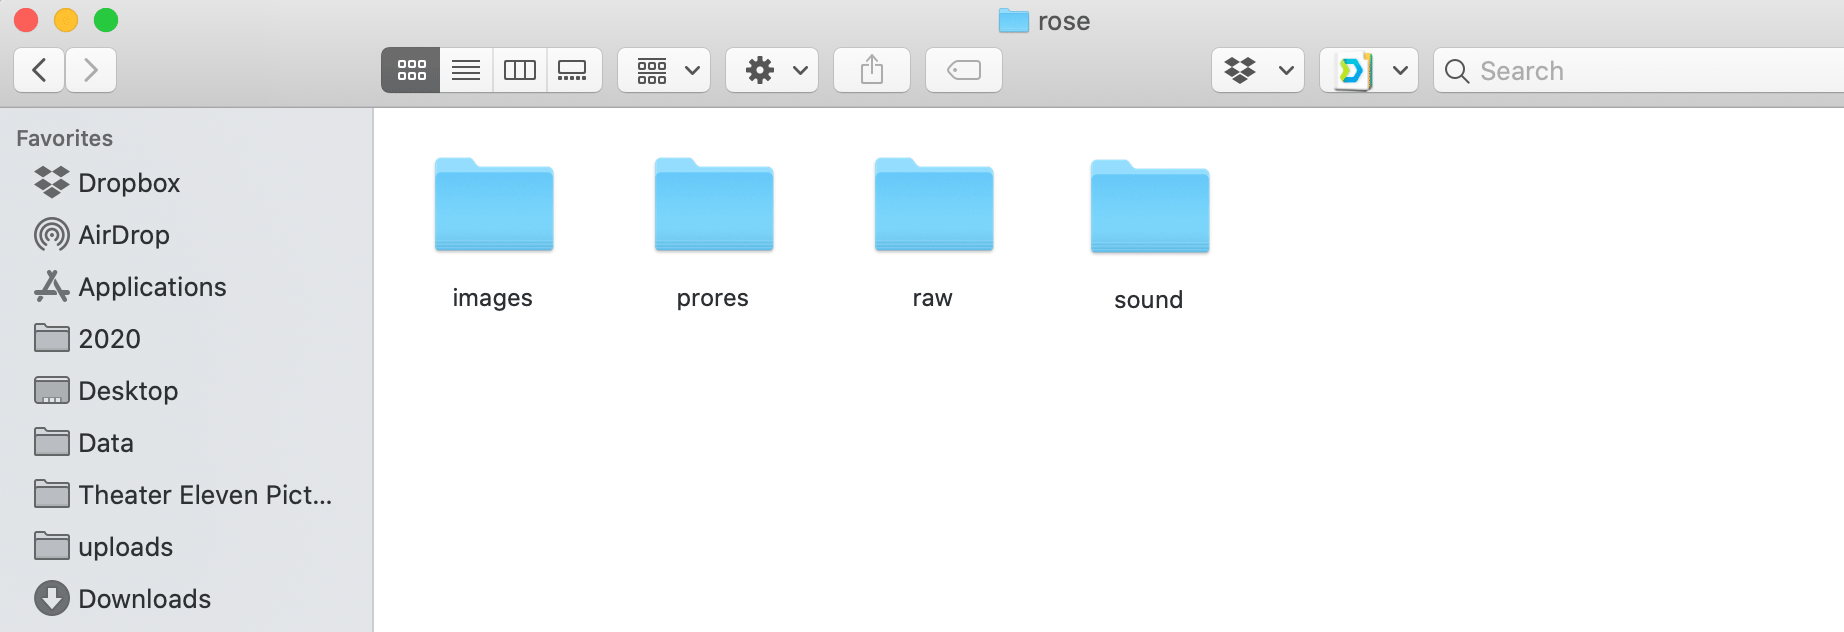
The easiest way is to airdrop the files to your computer. After obtaining the files (downloads folder), copy all of the .MOV files into the raw folder of your project.
You can also grab the files after a normal iPhone to Mac import. If you’re familiar with Apple, you know imports dump all the videos into the main photo library. Open Finder and go to your User Folder > Pictures. Right-click on the Photos Library and choose Show Package Contents. Open Masters and then navigate to the date of the import.
If you’re new to 4K, there are different types, as you’ll soon see when creating your project in Avid. DCI 4K is a pixel resolution of 4096×2160. 4K UHD is 3840×2160.
Moment says on their website that the lens is a 1.33x or 2.40:1 aspect ratio. The 2.40:1 part isn’t accurate. I beat my head against the wall a bit, then finally reached out to Moment to get the official word.
Turns out the Moment anamorphic lens is a 2.36:1 aspect ratio. Footage comes squeezed from the camera at UHD dimensions of 3840×2160. The actual project size to unsqueeze would be 5106×2160 or 3840×1624. 5106×2160 is not broadcast standard, so when you deliver you’d need to size that down.
For any of you who have shot with Moment's desqueeze setting to on, you know the resulting footage is 3840x1624. So if you don't want to lose quality, make sure that setting is off in the app. I think it defaults to on!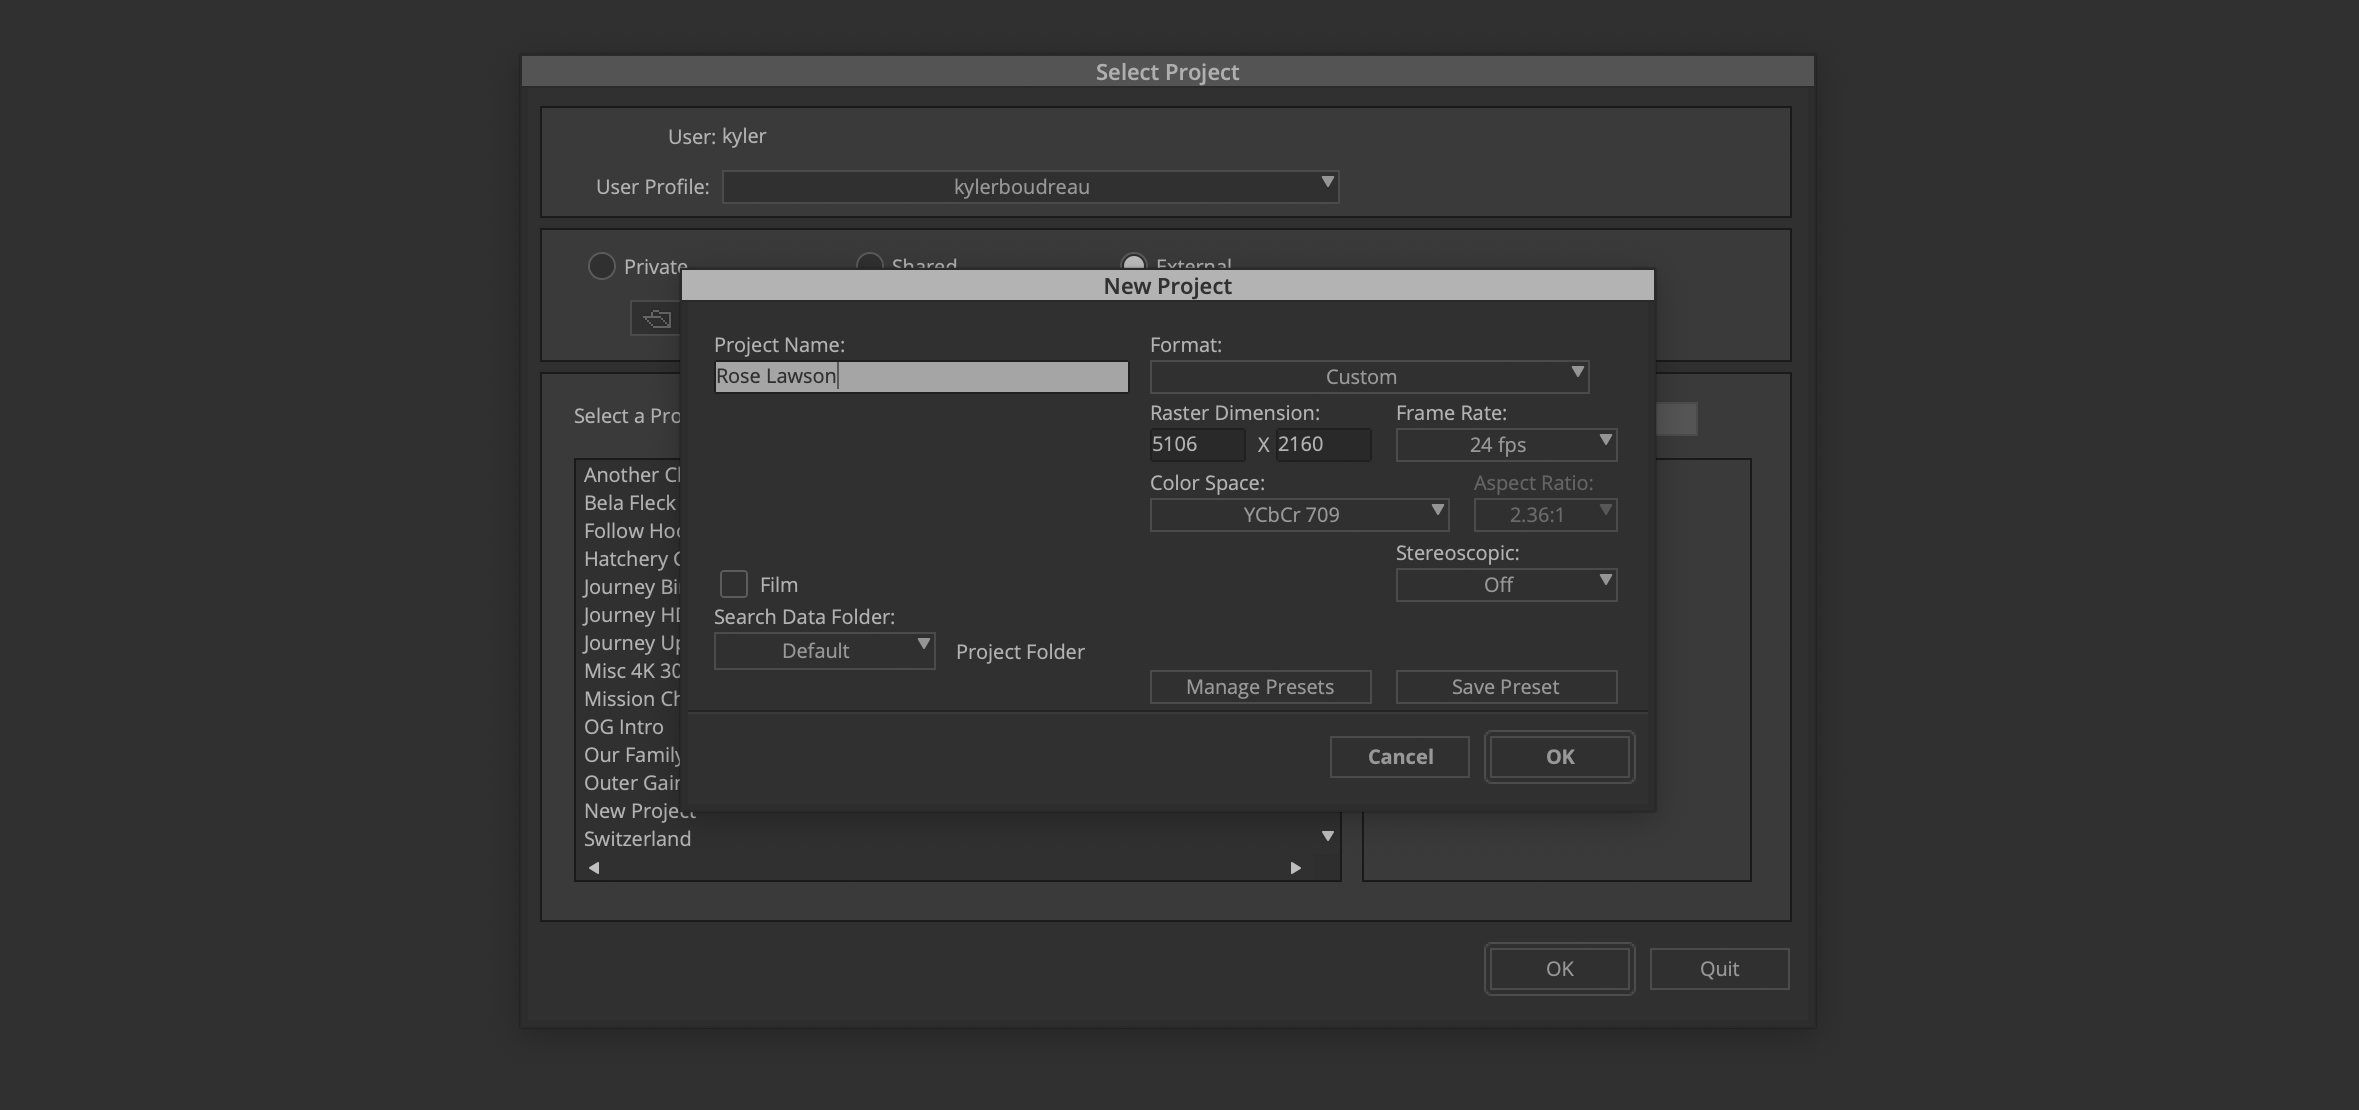
Click a new project and choose Custom under format. Type in 3840×1624 and you’ll see the Aspect Ratio field automatically adjust to 2.36:1.
As mentioned, back in the day you’d receive tapes from the lab and digitize the footage. Avid would create MXF files (formerly OMF files) to represent each digitized clip. You can still do this, but there can be drawbacks. Here we will do the AMA link method.
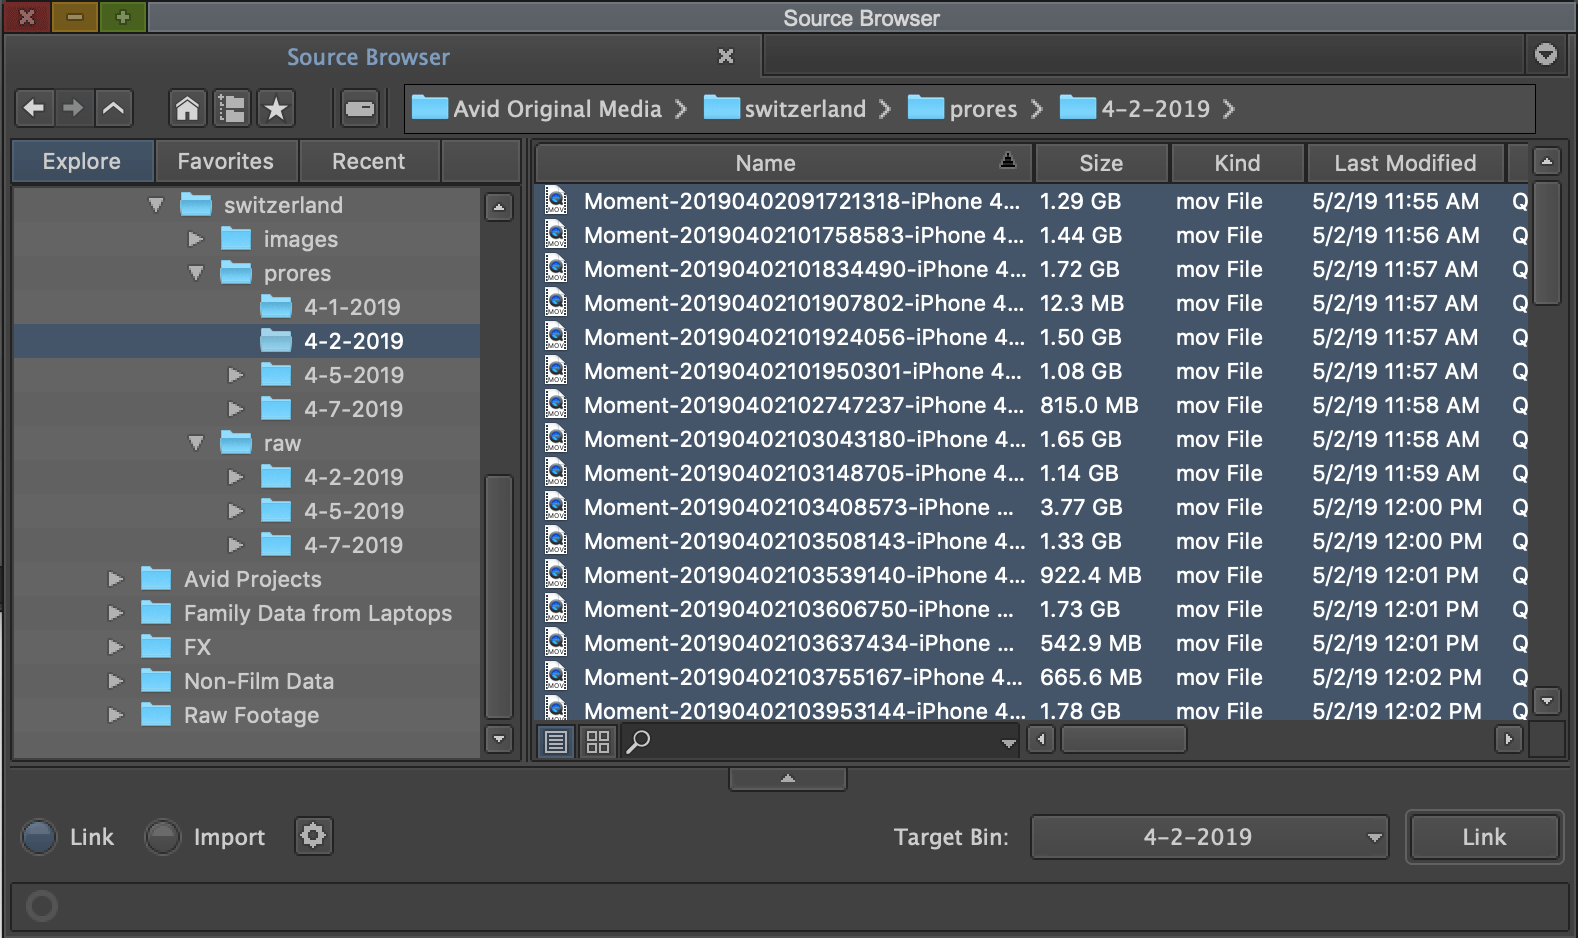
Open a bin, right-click inside and choose Input > Source Browser. Navigate to the raw folder and link your footage! You can also simply open Finder and alt-drag the files into the open Avid bin. This automatically AMA links vs importing. If you drag without holding the alt key, it will import vs link.
Once the AMA linking is done, simply close the Source Browser and double-click on a clip to view in the Composer Window. You’ll see that Avid automatically adjusts the 3840×2160 footage to match your project settings!
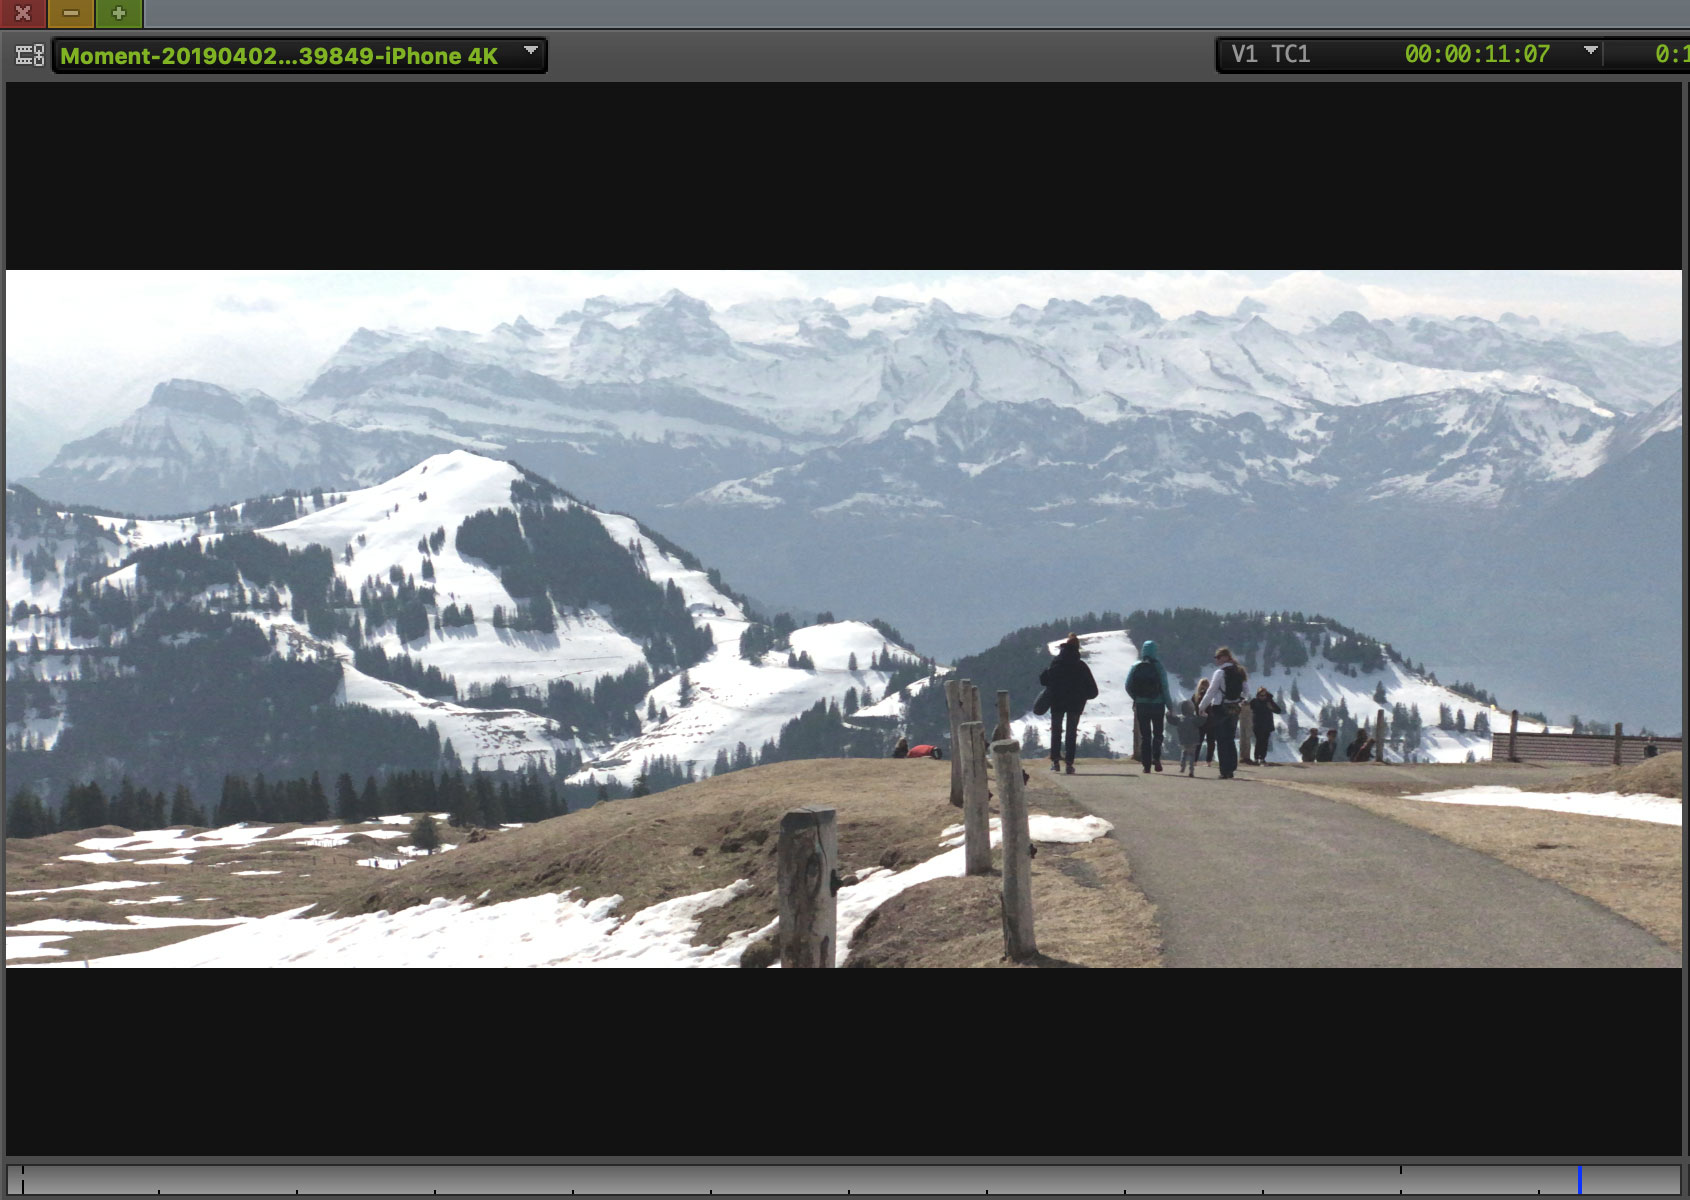
However, playback could be an issue, especially if you did a high data rate when recording (Moment Pro and Filmic Pro allow you to change this) and you’re cutting on a MacBook Pro like me. If you notice stutter, you should transcode your footage.
Transcoding footage allows you to create new clips at a lower resolution, and then cut in a resolution that your computer can handle. Once you’re editing is done, simply relink to the original source footage with zero quality loss!
To transcode, highlight all of the clips in a bin, and right-click. Choose the Consolidate/Transcode option. It will bring up a window with settings. Select the transcode radio button.
Next you’ll need to specify Target Drive, Raster Dimensions, Target Resolution and Linked Source Scaling. All of this depends on the length of your project and the speed of your computer. Just be sure to check the Keep Source’s Frame Rate radio box to ensure no relinking issues later.
There are no wrong answers here. You can set the Raster Dimension to 1/4, Target Resolution to Avid DNxHR LT and the Source Scaling to something less than full. This will all help your playback and editing be more enjoyable.
After you transcode, the AMA linked clips will now show the new code information. If you’re wondering what codec and quality to choose, I went with high on everything (including DNxHDR HQX) and playback was fine vs the stuttered playback of H.264.
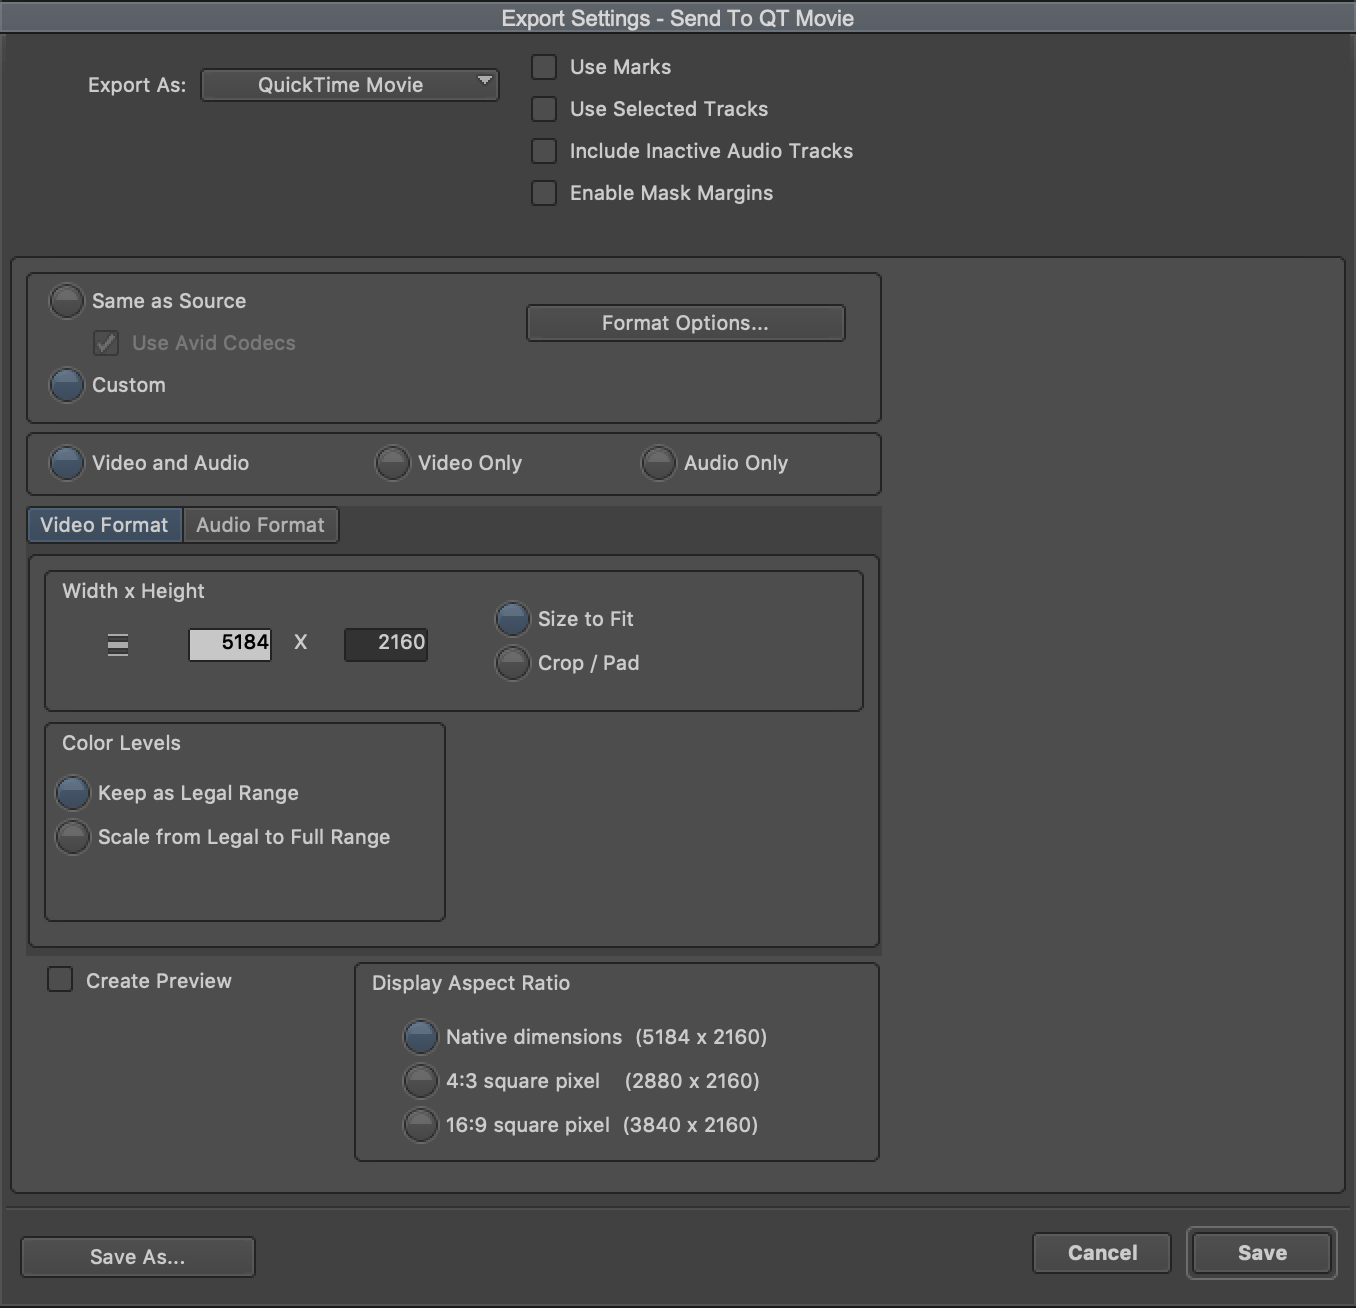
When you have a 4K sequence ready for export, simply go to File > Output > Export to File. You’ll need to choose Custom vs Same as Source and then specify the dimensions. If you leave it at Same as Source you’ll get a quicktime file with a green screen instead of your footage.
BOOYAH! That’s it.
Cutting 4K iPhone footage shot with the Moment Anamorphic lens is a ton of fun. And it’s shocking how far technology has come. Now anyone has the tools they need to tell a good story without spending a fortune.


Sometimes it's my latest film. Or a new review. Maybe a write-up on fly fishing? What I can promise is that it'll be good!